


eBook: Deep-Dive Demo of Metareal Stage V2 for Creating Digital Twins19817
Pages:
1
 WGAN Forum WGAN ForumFounder & WGAN-TV Podcast Host Atlanta, Georgia |
DanSmigrod private msg quote post Address this user | |
| Metareal Inc. is a WGAN Marketing Partner --- WGAN-TV | Part 1: Features and Benefits of Metareal Stage V2.0 for Creating 3D Digital Twins | Guest: Metareal Inc. Co-Founder and CEO Gareth Morgan | Episode: 214 | Thursday, 25 April 2024 | www.Metrareal.com @gareth WGAN-TV Part 2 | Deep-Dive Demo of Metareal Stage V2.0 for Creating 3D Digital Twins | Guest: Metareal Inc. Co-Founder and CEO Gareth Morgan | Episode: 215 | Thursday, 2 May 2024 | www.Metareal.com  WGAN-TV Podcast | WGAN Forum Podcast  WGAN-TV Podcast | Part 1: Features and Benefits of Metareal Stage V2.0 for Creating 3D Digital Twins | Guest: Metareal Inc. Co-Founder and CEO Gareth Morgan | Episode: 214 | Thursday, 25 April 2024 | www.Metrareal.com  WGAN-TV Podcast | Part 2: Features and Benefits of Metareal Stage V2.0 for Creating 3D Digital Twins | Guest: Metareal Inc. Co-Founder and CEO Gareth Morgan | Episode: 214 | Thursday, 25 April 2024 | www.Metrareal.com WGAN-TV Podcast | Part 1: Features and Benefits of Metareal Stage V2.0 for Creating 3D Digital Twins | Guest: Metareal Inc. Co-Founder and CEO Gareth Morgan | Episode: 214 | Thursday, 25 April 2024 | www.Metrareal.com WGAN-TV Podcast Part 2 | Deep-Dive Demo of Metareal Stage V2.0 for Creating 3D Digital Twins | Guest: Metareal Inc. Co-Founder and CEO Gareth Morgan | Episode: 215 | Thursday, 2 May 2024 | www.Metareal.com WGAN-TV Forum Podcast | Part 1 | Deep-Dive Demo of Metareal Stage V2.0 for Creating 3D Digital Twins | Guest: Metareal Inc. Co-Founder and CEO Gareth Morgan | Episode: 215 | Thursday, 2 May 2024 | www.Metareal.com WGAN-TV Forum Podcast | Part 2 | Deep-Dive Demo of Metareal Stage V2.0 for Creating 3D Digital Twins | Guest: Metareal Inc. Co-Founder and CEO Gareth Morgan | Episode: 215 | Thursday, 2 May 2024 | www.Metareal.com WGAN-TV eBook | Part 1: Features and Benefits of Metareal Stage V2.0 for Creating 3D Digital Twins | Guest: Metareal Inc. Co-Founder and CEO Gareth Morgan | Episode: 214 | Thursday, 25 April 2024 | www.Metrareal.com WGAN-TV eBook | Part 2: WGAN-TV Part 2 | Deep-Dive Demo of Metareal Stage V2.0 for Creating 3D Digital Twins | Guest: Metareal Inc. Co-Founder and CEO Gareth Morgan | Episode: 215 | Thursday, 2 May 2024 | www.Metareal.com  WGAN-TV Training Academy WGAN-TV Training Academy | Part 1: Features and Benefits of Metareal Stage V2.0 for Creating 3D Digital Twins | Guest: Metareal Inc. Co-Founder and CEO Gareth Morgan | Episode: 214 | Thursday, 25 April 2024 | www.Metrareal.com WGAN-TV Training Academy | Part 2: WGAN-TV Part 2 | Deep-Dive Demo of Metareal Stage V2.0 for Creating 3D Digital Twins | Guest: Metareal Inc. Co-Founder and CEO Gareth Morgan | Episode: 215 | Thursday, 2 May 2024 | www.Metareal.com WGAN-TV | Part 1: Features and Benefits of Metareal Stage V2.0 for Creating 3D Digital Twins | Guest: Metareal Inc. Co-Founder and CEO Gareth Morgan | Episode: 214 | Thursday, 25 April 2024 | www.Metrareal.com WGAN-TV Part 2 | Deep-Dive Demo of Metareal Stage V2.0 for Creating 3D Digital Twins | Guest: Metareal Inc. Co-Founder and CEO Gareth Morgan | Episode: 215 | Thursday, 2 May 2024 | www.Metareal.com WGAN-TV | Part 1: Features and Benefits of Metareal Stage V2.0 for Creating 3D Digital Twins | Guest: Metareal Inc. Co-Founder and CEO Gareth Morgan | Episode: 214 | Thursday, 25 April 2024 | www.Metrareal.com WGAN-TV Part 2 | Deep-Dive Demo of Metareal Stage V2.0 for Creating 3D Digital Twins | Guest: Metareal Inc. Co-Founder and CEO Gareth Morgan | Episode: 215 | Thursday, 2 May 2024 | www.Metareal.com Video: Metareal Stage Player V2.0 | Video courtesy of Metareal YouTube Channel | 16 December 2022 (Credit: Metareal Stage 3D Digital Twin by WeChalet/Le Vertendre) 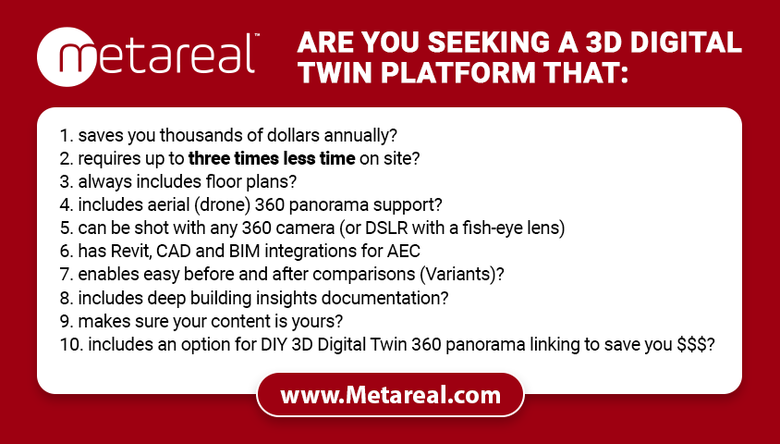 www.Metrareal.com WGAN-TV eBook: Part 2 | Deep-Dive Demo of Metareal Stage V2.0 for Creating 3D Digital Twins Hi All, [WGAN-TV eBook (above) ... WGAN-TV Podcast (above) ... Transcript (below) ...] Would you like to see a back-end demo of Metareal Stage V2.0, including: – how to create a before and after slider within the tour? – how to add drone 360 panoramas? – how to create a virtual tour of a space that has not yet been built? Stay tuned ... On WGAN-TV Live at 5 (5 pm ET) on Thursday, 2 May 2024, my guest Metareal Inc. Co-Founder and CEO Gareth Morgan. (@gareth) WGAN-TV Part 2 | Deep-Dive Demo of Metareal Stage V2.0 for Creating 3D Digital Twins Gareth will show and tell us about the back-end of Metareal Stage V2.0. What questions should I ask Gareth during the show? Best, Dan P.S. .... In Part 1 of WGAN-TV Live at 5 (5 pm ET) on Thursday, 25 April 2024 ... [i]Are you seeking a 3D Digital Twin platform that: 1. saves you thousands of dollars annually? 2. requires up to three times less time on site? 3. always includes floor plans? 4. includes aerial (drone) 360 panorama support? 5. can be shot with any 360 camera (or DSLR with a fish-eye lens) 6. has Revit, CAD and BIM integrations for AEC 7. enables easy before and after comparisons (Variants)? 8. includes deep building insights documentation? 9. makes sure your content is yours? 10. includes an option for DIY 3D Digital Twin 360 panorama linking to save you $$$? Stay tuned ... On WGAN-TV Live at 5 (5 pm ET) on Thursday, 25 April 2024, my guest Metareal Inc. Co-Founder and CEO Gareth Morgan. WGAN-TV Topic: Features and Benefits of Metareal Stage V2.0 for Creating 3D Digital Twins Gareth will show and tell the features and benefits of Metareal Stage 3D Digital Twin platform. Gareth will also include a demo of the front-end: what the user sees. |
||
| Post 1 • IP flag post | ||
|
WGAN Forum Founder & WGAN-TV Podcast Host Atlanta, Georgia |
DanSmigrod private msg quote post Address this user | |
| WGAN-TV | Part 2: WGAN-TV Part 2 | Deep-Dive Demo of Metareal Stage V2.0 for Creating 3D Digital Twins | Guest: Metareal Inc. Co-Founder and CEO Gareth Morgan | Episode: 215 | Thursday, 2 May 2024 | www.Metareal.com ============================================================================= Transcript: Part 1: Features and Benefits of Metareal Stage V2.0 for Creating 3D Digital Twins ============================================================================= Transcript: Part 2: Deep-Dive Demo of Metareal Stage V2.0 for Creating 3D Digital Twins (Below/Video Above) With Metareal Stage, version 2.0 3D digital twin platform: - - How do you create a before and after slider within the digital twin? - - How do you add drone 360 panoramas? - - How do you create a virtual tour of a space that has not yet been built? Stay tuned. … Hi all. I'm Dan Smigrod, Founder of the [www.WeGetAroundNetworkForum.com]. Today is Thursday, May 2nd, 2024. You're watching WGAN-TV Live at 5: a podcast for digital twin creators shaping the future of real estate today. We have an awesome show for you! Part 2: Deep-Dive Demo of Metareal Stage V2.0 for Creating 3D Digital Twins. Our subject matter expert is [www.Metareal.com] Co-Founder and CEO Gareth Morgan. Gareth, thanks for being back on the show. - Hi, Dan. It's great to be back. - Gareth, thank you again for being back on the show. For our viewers to watch: Part 1: Features and Benefits of Metareal Stage V2.0 for Creating 3D Digital Twins, please go to: www.WGAN.info/MetarealOnWGAN Gareth, why don't we just jump right in and show and tell us about the backend of Metareal Stage V2.0? - Sure thing. I've got a couple of little sorts of slides and I don't want to bore you with too much PowerPoint. I want to dive straight in, but just to sort of tee things up, I'm going to share my screen. And just to sort of start things off, one of the things that it's important to get across when working with Metareal, [www.WGAN.info/MetarealOnWGAN] is that there's kind of two basic ways of working with the platform: 1) There's what we call the do it yourself approach, where you start, you upload your panoramas, you do the 3D reconstruction and creating the rooms. You assemble the tour, you do any presentation, customizations, any logos, any branding that you want to do, and then you go ahead and share it with the clients. 2) The other approach is to use our full service approach, which basically you upload the panoramas, you ship the job off to us, you choose whether you want it 24 or 48 hour turnaround. And then when you get it back, you get something that's ready to share it straightaway. Something's ready to publish. And that's it. What I want to get into today is I'm going to show a little bit of both workflows and get a bit deeper into the Metareal Stage tool because even if you are using the full service option, you still get a tour that you can work with, that you can actually edit and do whatever you want with. And you have the same access to the tools that we have. So it's something that you can go in afterwards. So there's still, it's still a good idea to have a kind of idea of how the tools work. I could probably just skip over the camera. Basically, one of the key things about meta is you can use any camera you like. It's not like there's a list of specific supported cameras that can include a DSLR, if you've got a panel bracket, or any of the 360 cameras on the market, or even if you have a rotator and a wide angle adapter, you can shoot with a phone. The key requirement is that you can shoot 360 panoramas and the better the geometry of the panoramas, the more accurate your models you're going to be. In terms of shooting, it's very gregarious. You can choose how many panoramas you want to shoot, where you want to shoot, and at a minimum you want to have one panorama per enclosed space. You want to have line of sight between the panoramas to make the navigation nice and smooth. But if you want more detail, you can go ahead and add as much and as many panoramas as you want. But it's really very, very flexible from that point of view. So the next thing I want to just quickly introduce and then we'll be off the PowerPoint slides, is the kind of main four screens of the user interface. So in Metareal Stage we've got four important kinds of Editors, Editor screens. You've got the Project Browser. This is your homepage when you log into your account. When you open a project, we can see some here and we'll get onto that in a second. You have the Project Dashboard and that has all the assets and all the main functions that you're going to do with a project. And then from the Project Dashboard, you can open the two Editors. There's the Room Editor where we do the image-based modeling, the 3D reconstruction, and there's a Tour Editor where everything is assembled. We can look at navigation, we can add logos, we can customize the UI elements for the player. And that's really all you need to know, outside of that of course there's some subscription management, there's some other kind of account management interfaces, but that's really the crux of it. So I'm going to sort of dive right in and give you a little overview of the Project Browser. So when you log into your account, this is my account, you'll have a view of all the projects and a little thumbnail, which is actually the starting point of the tour when it's published and all the projects in your account. Now this is organized to be able to handle a very large number of projects. We have customers with thousands of pictures in their account, so there's some filtering tools and we can go ahead and add, for example, we could add a filter by project name and it could be something like that. And now we've got the view filtered by the project name and we can stack those filters. We can choose how many tours we're going to display on screen. We can also switch to a list view, and that gives us the ability to add custom columns. So we can add these custom columns here, which can be anything you want. It could be, let's say you're a team of five people, you're on a premium or an enterprise account and you have different workflows where different members of the team are going to see the projects. You can use these custom columns to assign projects to different users, or maybe you've got multiple clients, so you want to be able to say which customer of yours that the project belongs to. So you can actually go ahead and customize this, a little UI for customizing the tag columns, adding the different tag ranges and that kind of thing. So it's very flexible and it's optimized around being able to organize very large numbers of projects very efficiently. So we'll put it back into that. When I open a project, and let's just say, I'm going to step in, I've already got projects open just to speed the loading process, right now we're running, I said we'd be released with V2 today. It's actually going to be a few more days. So we're running on the staging node. It's a lot slower than the production node, so I've preloaded some of the pages just to make things go a bit more smoothly. So here I've got a project, this is actually a completed project. So we can see the images that have been uploaded. We can see the list of rooms that have been reconstructed, and we can go ahead and pop into the Tour Editor. So this is the Tour Editor for that project. And I've got a number of views, so I can go to my Plan View and I can see the different floors of my project. I've got a model view, which some folks will be more familiar with as a dollhouse. And this allows me to look at the 3D model. I can actually go ahead and switch on the navigation map and see exactly what my navigation path is going to be between all the panoramas and in the space. And I can choose the navigation type. So for example, here we've got black navigation lines. So that means I'm going to transition smoothly and do a kind of smooth movement between the two panoramas. Sometimes we don't want a smooth movement, we want to jump between the two panoramas. So I can select there and just switch the transition type from travel to teleport. And it'll jump through. Sometimes maybe we've got a closed door and we don't want to sort of the discomfort of flying into the wall. So we can just jump between the two points. And I've also got what we call the Design View. And this gives me the ... this is the Editor where I handle the presentation layer. So where I'll set the start point of my tour and the start point ... start view of my model view and the start view of my floor Plan View. It's where I can switch on or off all the different UI elements for the tour player when it's published. So for example, we could say we want to show the mini-map, and we want to show it by default. So now that's popping up in here and I can see I've got my little mini-map that's navigable for the tour. We can also, I've got my room chooser, so I can actually have my different saved locations in the tour that people can access instantly. And I've got different things. I can change the icons, I can change my nadir logo. I can also add various elements. So at this point, if I want to add dimensions to my tour so that the viewers of the tour will see dimensions, I can go ahead and do that. And there's a whole selection of ... the UI is extremely customizable. So we can change the navigation node type, we can have little VR style navigation points. We can change the field of view. We can add a title. We can add a custom tour thumbnail. Maybe we want to put a branding up ... at the front of the tour and nadir logo. We can actually change the icon for the panorama locator. We can change the smoothing type of the panoramas. When we zoom into the panoramas, we'll see a certain kind of smoothing and we can make it a bit sharper if we want. We've got all the colors for the user interface. You can even go in and change all the icons in the player. So it's completely customizable. You can set the button rounding from square to round. You can change the button colors. And in fact there's quite a lot of parameters there to save. So what we do is ... to change. So it would be laborious to change that every time if you've got a customer that wants a certain style. So you can actually save all those settings as a template and they can be loaded up when you are working with the tour. I'm glad you're approved. So we can navigate around the tour. And then we've got another version, which is the preview view, which is the same as the Design View, but with all the UI elements hidden. So we can actually just see what our published tour is going to behave like when we finally publish it without having to go through the publishing step. And to that point, actually, I'm going to pop back to the dashboard. And right now we don't have any published versions in this tour, but one of the key things about the way the Editors relate to the publicly accessible versions of the content you're creating is the publishing process. So, we're able to publish our tours. We have a number of data centers worldwide. So depending on where you are, you might want to publish to more than one. So Oceania, Australia, Asia Pacific, various tour servers in Europe, South Africa, and a couple in the US. So I'm going to choose a data center. We can set a tour access password, we can add our own Google tag if we want to use Google Analytics to track the tour events, the tour visits. And I'm going to hit publish. And what that's going to do now is it's going to take that tour that was in the Editor, strip off and optimize it for viewing in the player and get rid of all the stuff that's to do with the Editor and it's going to create us a publicly accessible link. Now obviously people downstream are going to want to integrate that link into their different online assets whatever property it might be, Rello, whatever. And so what they can do is, once that link is created, it's always possible to republish to the same link with the latest version that you have in the Editor. So if you want to make changes, you can republish, you can also have multiple versions published of the same tour in the project. So you can publish as many versions as you want. Maybe it's a building, it's a condo development and they've got a kiosk. So you want a version with no UI for the kiosk. You've got a version online, maybe you want to have a version that's mobile that has kind of slightly different UI elements, that kind of thing. So there's an ability to be quite flexible and to have lots of different options there. We also have the ability to export various data. So we can export the floor plan as a vector DXF file, which is very suitable for importing into AutoCAD, that kind of thing. We've got a couple of 3D file formats, FBX and OBJ, which are great for exporting again into architectural platforms, into game engines like Unreal or Unity. You can take a package copy of your project. So if you want to make a backup of your project offline, you can do that. Obviously it's a Metareal format, you need to bring it back into material to use it. But you're able to make an offline backup. You can export all the panoramas and you can also export what we call the project stats, which is a way to get, I'll just call up, it's a bunch of CSVs with a bunch of analytics information from inside the tour. So we go here so we can have all the stats of the doors because the Metareal tour is inherently quite well classified. it has, everything's broken down into doors, windows, rooms, and so on, walls, you've actually got, we can export CSVs of all that data, so you can find the floor area, the wall areas, the number of the inventories and different things. And in fact, when we're, what I'll do, I've probably covered the dashboard pretty well and the tour. I'm actually going to go ahead and jump right into showing you what reconstructing a room looks like if you want to do the DIY workflow. So I'm going to pick these two panoramas, I can see the beds, so they're obviously the same room there. I'm going to go and create a new room using those two panoramas. So it's going to open it in a new window there. And actually that's another point that's worth mentioning. Metareal is a very multi-tab friendly platform, so you don't need to keep reloading the same window. You can open lots of windows on different projects, different views of the project, and it just handles that very well and they synchronize with each other quite well. So here I've got two panoramas. This one is my reference panorama. So it's kind of my anchor in the world. I've got my lens height set to 1.72 meters. I might want to change that. If I haven't remembered my lens height. And we triangulate all the scales and the dimensions from the lens height. So lens height's very important. If for whatever reason I didn't mark down my lens height for a given panorama, as long as I know the dimensions of something in the floor plane of the room, let's say the doorway, we can actually calibrate the scale directly from that. So we could go ahead and set this up and measure it, indicate what dimension that is, and we can calibrate the lens height from that. In this case, I know it's okay, so I'm not going to worry about that. So to reconstruct a room, I've got two panoramas, they're just two dimensional, 360 images. How do I get that back into a 3D model? So what I'm going to do is quickly go to my draw tool. One thing I want to do first is to check that my panoramas are really level. One of the problems with a lot of the 360 cameras is though they have leveling units like inertial measurement units to work out which way is up. The orientation axis is very close to the lens. So it means that they're inherently kind of inaccurate. They can't be that accurate. So we always need to make sure that we have a better, actually accurate leveling of the room because our system kind of assumes that the floor is actually level. - Gareth, do you measure to the center of the lens from the ground up? - Yes. - To the center? - Yeah, to the nodal point. Yep. And actually you're not supposed to be seeing the little green things there. The little green things are one of our AI experiments, it's actually doing feature recognition. We're on staging node, we're not on the release version yet. So yeah, you're seeing those little guys. So I've now added two level lines to my panorama and if I go take a look, I'm able to switch those off, it doesn't matter. I've now ... we can see things in nice and square, so I know I've got a nice level panorama. I've also got a world grid in the 3D space. Let's switch that on and I want to make sure my room's aligned to that, because a lot of the tools will snap to the grid. So I'm going to use this red line to do another snap and just to make sure that the room is precisely aligned with the 3D grid. Now with that done, I'm going to, I don't need to see the grid anymore. I'm going to go ahead and trace out my floor line. - And for clarification, you're in the Metareal Stage Room Editor. And this is an example of do it yourself, but you could just have Metareal do everything that you're doing right now for you. - Yeah, that's exactly it, yeah. And I'm just going to quickly mark-out some windows. Yeah, you could just ship it off and to have it processed by us, yeah. - When you do the process though. The section you were in to begin with was the Project Browser. So whether you're having the tour built by the Metareal team or not, you still want to do all the settings in the Project Browser before you upload, so that the actual people know all the deliverables of how you want your tour to look. - Right. - So for example, you had the Room Picker that was important for the team to know, so that they actually choose images on your behalf for the Room Picker. That said, you can always pick different images, but at least if you go through the Project Browser and set all your defaults for this, for a particular virtual tour, then you're going to get the best possible results back. - Right. I mean, if you don't do any of that, you'll get back -- They'll do their best anyway. And it's very easy for you to change when you get it back; anyway. It's a matter of a few seconds. If you are using the full service option, you'll go create a new project, you'll upload your images here and then you'll hit build it for me and that'll kick off a job, you'll go through the checkout process. [Part 1: www.WGAN.info/MetarealOnWGAN] Our pricing model is a little different from some of the other folks out there in the sense that we separate processing from hosting and access to the tool. - Yeah. So let's just figure everybody's going to watch Part 1. And so that way we won't have to repeat anything that we covered in Part 1 for today's show. - Perfect. So I've added an object there. I might want to mark out another, and in this case, when I click on the object, I can categorize it. So we've got a little bit of a UI glitch there, but I can say, it's a dresser, so now I've categorized it as a dresser. And then when we extract the data, when you extract the stats from the system, it's got that volume, that object, that location marked as a dresser and it's identified and categorized in the system. I'm just going to pull out another little volume here just to mark out the bed. How far you go with these models is really up to you. You don't need to add a whole lot. Once you've got the room reconstructed, you've essentially got the 3D elements that you need. We want to add the door; that's pretty important because the door is how we connect the different rooms together. We want to make sure the thickness is right with the wall. In this case, my door handle is on this side, so I'm going to rotate the door, so the handle is on the right side and it's an open door, it's opening inward to the room and it's a single door. So I've got those options set and that's basically it. Now what I want to do is align my second panorama to my 3D model. So again, the first step is to draw the level lines. Yeah, you really shouldn't be seeing those little green things there. Sorry about that. Like I said, we're not quite released with V2.0 yet. So there's still a few little glitches here and there. So now I've got that guy aligned and I'm going to go back to my Plan View and just go to, again to my Alignment Tool. And I've got a bunch of different options. I'm going to use the Interactive Alignment here and I can just whip around my panorama and very quickly line it up with the 3D model of the room. And I can probably be more precise, but I'm just working through this quickly. And now we have a 3D model of the space that we can move through and that will connect to the other models in the tour. And so that's my new room there. It was a copy of bedroom one. If I go now to my Tour Editor and we go back to the Plan View, back to my floor, first floor. - Just for clarification, because I just want to drive home this point is, everything you've just shown in the Room Editor, the screen before, yes. In the Room Editor, you have a choice. You can either do this yourself, or you can let the Metareal Stage team do this for you. That said, it's probably a good idea to actually know how to do the Metareal Stage Room Editor, so that if you want to make any quick changes, touch-ups after you get the job back, you'll know how to do that. - Yeah, I mean you don't need to know how to do the reconstruction if you're using the Metareal processing service. However you might want to, you might want to add some details that the production team even doesn't know you need. What you are going to want to learn probably is the Tour Editor, which is where you can see how your tour and all the navigation works and where you can control in the Design View all the presentation elements that you might want to customize. Now, if you want particular logos in your tour, you can go ahead and add them before you submit the job. So you can go ahead and add the nadir logo if you have other customizations you want to do. You've got a Skin you want to use that you've prepared before. You can load that into the Tour Editor and then submit the job and the team will use that as the processing. - The Skin. Can you expand on what that means? - So when I talk about a Skin, I'm talking about all these options in the Design View of the Tour Editor for that we looked at just now for the icons- - Ah! So if you're doing work for ABC Realty and they like these colors, they want the Room Picker, they want the mini-map, you want to save that; essentially it's a template for that particular client. - Right. - You want to be able to say to the Metareal Stage team, this is the template to use and in your team's language that's called the Skin. - Yeah. And so that will ... if you've applied a Skin when you submit the job, the tour will come back with that Skin applied and it can be as comprehensive or as minor as, maybe it's just a logo in the top right corner, that kind of thing. - So just to add to that, you're a busy professional photographer. You're working on multiple clients, by accident you select ABC Realty Skin where it really was supposed to be XYZ Skin. After the job comes back, you can reassign the correct Skin to the project. Doesn't affect anything that the editing team has done, though if you had not ... for XYZ you had not had that Room Picker, what I think of as a Highlight Reel at the bottom, then they would not have picked the images for the Room Picker. But there isn't any reason you can't switch to a different Skin after the fact. - Right, exactly. So you know what you do is you get the tour back and oh, it's got the wrong Skin, or you go load up the right Skin and then you'll go back to your Project Dashboard and you'll go to your republish button here and you'll go to republish and you'll just hit publish again and it'll update that public link with the corrected content. - Is there a section in the Tour Editor to save templates? - Yeah. - To save Skins? - Yeah. So down here you can just hit save. - I see save, but I then is there a place where I name that Skin ABC - - Well it's a local file, so you're going to save it to your local disc as a zip file. - And so there's my opportunity to name it. - Yeah. And you can keep that locally. So it's -- If you want to apply it, you just load it up and apply it to the tour. Alright, now I want to ... We're 27 minutes into the show, let's quickly zip through -- So that's kind of the DIY workflow and the delta [difference] between DIY and full service and what you get. We talked about publishing, let's go- - I think you were going to go into the Floor Editor, - The Tour Editor? Yeah, well we kind of looked at that as well. - At the floor plan. - We can look at that for sure. So. Oh yes, so I was going to show connecting the rooms. That's right, Thanks. So I'm going to reopen this and so we're in the Plan View. I created a new room. In fact, I mean the room already exists. It's bedroom one, but I'm going to delete that one. And this is the room that I just created so we'll pop it out here and it actually snaps into the right place. But it might be that; what we use is we use door names. So if the doors have the same name, they'll connect together automatically, which makes building, assembling the building very quick. - And again, you don't need to do this step if you've asked the Metareal Stage team to assemble the tour for you. - That's right. - So if you didn't do that, this is the process of how you take all the rooms, put them together to create your floor plan. - In this case, this is the other version of that room. - And again, I would suggest it's probably helpful to know how to use the room -- the Tour Editor. Forgive me, we're in the Tour Editor. We just happen to be in the floor plan section. - That's right. - So did you want to know how to do this so that when the floor plan comes back and somehow the living room was named living room, but you're in the South where it's actually called the sunroom, then you'll know how to change it if you didn't specify that name to begin with. - And it'll just snap together. So, and that should be, it's a little slower than I'm used to on this staging version. So there we have our room and we can organize our building into floors, which are really just groupings of rooms. So you select rooms and you create the group and you can organize them in space according to the heights of the rooms or by connecting the rooms together through doors, which can be in ceilings and floors as well as in walls. So that's a kind of very quick high-level overview of the reconstruction process and the kind of conceptual breakdown between the Room Editor where we do the 3D reconstruction and the Tour Editor where we assemble the tour, look at the navigation and prepare the user interface for the actual end user experience. What I wanted to do, and one of the things we touched on [Part 1: www.WGAN.info/MetarealOnWGAN] I was looking at drone imagery and interactive elements. And this is a great tour we saw the other day. So here I've got, these are all terrestrial outdoor images here and I've also got a number of- - Gareth, excuse me, are we in the Project Browser? - This is the Project Dashboard for another project. - Thank you. Project Dashboard. Okay. - Yeah. So here we can see the different sections, any attached files, the rooms and the source images. And at the bottom here we have all the images that we've used to create the tour. And in this case it's one outdoor space. So we have one room and if I go into the Tour Editor, it doesn't look as pretty as when it's in the Room Editor, sorry. We can see what the space looks like with all the 3D elements. And again, you can see it's very simple, there's not lots and lots of scan data. There's a few cubes denoting the objects and we have our aerial panoramas. And really the key to getting the aerial panoramas in is, I'm just going to pop up there, is working out what the height is of the panorama. And that can be a bit tricky. The other thing with aerial panoramas is that they tend to be stitched together from multiple images, which means that the geometry isn't so good with the aerial panoramas. And you can see where we've got a bit of dislocation here, it's pretty normal. One does the best one can with aerial panoramas. In this case it was probably a windy day and the customer's trying to get the drone to stay in one place and take about eight shots, stitch them together. So the geometry isn't perfect, but what we can do is, we don't actually, obviously it's a drone, so we don't know exactly what the height was necessarily, depending on the drone. Some are good at measuring altitude fairly accurately. So what we would do in this case is, we'd make sure that we know the dimensions of one of these buildings. In this case, this cabin here is about 12 meters. And then we go ahead and measure it and then we can apply that dimension. We can say, well that length is 12 meters and then it'll actually back figure the lens height from that calibration. It's already all done in this one. So I'm not going to do it right now, but that's the way we can, just from looking at the image, work out what height the panorama should be to get- - And how many buildings or measurements should the photographer do laser measurements on in order to help with those aerial? - Just one is fine. It just needs to be something in the ground plane. We are just trying to -- anything is -- we need one known dimension in the ground plane from which to triangulate the lens height. That's it. It's possible to take more if you want just to be sure. If you measure three and there's a discrepancy, you might want to average between them. But in this case, one is normally fine. And so we can do that to locate our panoramas in the sky. We've created the sky box for the background and we've got our panoramas, our other panoramas located on the ground there. So if we head into the Tour Editor, because we were looking at all that in the Room Editor, we can now see that we've got a few other interesting things. So in the Plan View, obviously we've marked out some of the objects and said look, we want these to be visible in the Plan View. And really, in fact in this case, the customer used their own custom map floor plan in the tour. So these objects are really just there to help the customer locate the floor plan against the tour to sort of do the alignment. What I want to do now is go to Design View, and here we can see, so we've got our labels. And if I go to the Label Editor, I'm just going to move this a bit over here. This is the list of all the labels. So these are kind of the interactive tags that have been added to the tour. And if I head over, oops, I just added a new one, just get rid of that guy, I click on this label. So here we've got a label and if we go edit it, we'll see that it's got a YouTube video linked into it. We can go look at the source code, whoops, we can go look at the source code and it shows that there's a live frame with a YouTube video player. So these labels are basically HTML containers. They can link to anything. So anything you can do with a web page, or with JScript, you can do in a label. So it's pretty powerful. Should be using the Dark Editor, I guess. And in this case, what we've done is, we've set a little green border, we've added a YouTube video, we've told it that the interaction we want to have is we want it to be open on click and we only the icon to be visible no matter where we are in the tour, it could be just the same pano or just the same room. In this case we want it visible everywhere. And that's that. So that's basically the process that we would go through for creating interactive elements. And when we create the labels, they're actually placed in the 3D scene. So they're not sticking on the image, they're sticking on the model in the space. So the distance of the size of the button will be relative to the actual distance in the 3D space. So that's just one thing, one thing to bear in mind. So that's pretty much it for labels. We could do a whole other show just on labels. - Well, I was interested about how to do the before and after. - Oh yeah, we're getting short on time, so I just covered that. So drones, labels, if we go, okay, so here we have a tour and this is ... we've got a shoot of a chalet. I think this is one that we saw the end result of the other day. Now one of the sort of exciting things that we're able to do now is, I can go into settings and I can say enable Project Variance, and this allows me to have multiple shoots, multiple different dates, multiple different stages of the same space in the same tour. So we can see now we've got this new toolbar here, a new pano here and we've got the original variant and we've also got one called Renovated, which is a name. And what we'll see if we look at Renovated is that in addition to the original shoot, we've also got all these additional images that have a green dotted line around them and that denotes that they've been added in this variant. So they're new content that's exclusive to this variant and it's a more recent shoot of the same content. Here all these rooms have a yellow box around them, which indicates that it's been modified in this variant. So we took the original rooms and we created a variant and we modified the tour in this variant. And now if I go to the, if I go to the Room Editor, let me just go quickly take a look at that. We can see that we have, everything's underneath your little thumbnail there. We have an extra UI that allows me to see the two variants in the Editor. And so I can slide between them and I can see the before and after in the Editor. And I'm just going to, if we've got time, I would love to show you how to set that up. - Yes, please. - So what I'm going to do is, I'm actually going to take the original variant, I'm going to copy it. So we're going to make another copy of the original variant. It'll be called a new variant. And if I click on that, it is literally just a copy of the original tour. And what I'm going to do now is, I'm going to upload a couple more images. So we'll go find these images that I want. I think I'm going to find one of the smaller rooms. I think that's the one we've been looking at. That's the other one. I think that's the one. That one and that one. So I'm going to load up those two. So now I'm uploading them to the new variant. So they'll show up in a second, they'll take them a little while to process. We have a glitch with our busy icon as well to play. So the busy icon's broken, but it'll be fixed by Monday. So these two images are processing right now and in a few seconds they'll be ready. And then what I would probably do is I'll go to, I think it's bedroom one is the one. So I'm going to open the Editor, the bedroom one in this variant. And again, this is all stuff that if you're using the full service, you'd just be able to upload the additional panoramas and say align the panoramas in the variant. And so I've gone into my room with the old content, I'm now going to choose to add the images. Hopefully they're processed, not quite ready yet. I'm going to have to wait a bit. Okay, now they're processed. So I can go into the Room Editor again, hide the content that's already been used and I've got my two new images. They have the green borders around them. So I'm going to select them, add them in. And they're now added into the room in this variant with a black line through to show that they haven't been included or aligned into the space yet. So I'm going to pick one of them. And what I need to do is the same as always drawing the level line, make sure it's level. So we're just going to, doorways and windows are great. Wall edges tend to be, I don't know what it is, maybe the plasterers are not so good at getting their verticals. But doors and windows tend to need to be very straight. Oops, hang on, I'm just going to delete that guy and do it on the other side. Tend to need to be very straight. So there we go. That looks better. So if I go to my Plan View now I can see that my room's nice and square. What I'm also going to do, so I'm going to go ahead and just align this guy around my Alignment Tool and we can see my room isn't there ... it's going to line that up quickly and kind of fast here short for time. Just make it nice and tidy. So that's kind of roughly lined up with the room. What I want to do now is to make that, because I'm going to get rid of my reference panorama, which is my source of my triangulation, I'm going to make the new one a reference panorama. So we'll go back to here, make it a reference, and I transfer the reference to this panorama. And now what I need to do is actually just align this to my room properly. So we're going to go to here to get the panorama aligned with the world grid. So just like that. And that looks about right. So we go back to there and now I've got my new panorama aligned with my room. I'm going to go to my other panorama, my other new panorama, level it and line it up with the new reference. Just to go super quick as well. I'm not sure that my leveling is super good. I'm going to go and fix that a little bit better and extend a bit of a mess. So if I do want to check my leveling and it doesn't look like it's super good, I'm going to go to the Leveling View and we can see that we're a bit off there. So back to show my tours, I'm going to tighten that up. Maybe try another level line. Sometimes if you add a few extra, usually two is enough, but sometimes your exterior is helpful and we'll spin them here, try this side. Well, okay, back to the Plan View. Yeah, see we seem a bit better now. So quickly I align to that, take my rotation pivot. There we go. So now we've got our room with our new content and what we can do is we can take away the old panoramas and that's now updated to the new version. So now we can see we've got our new variant, we've just done, we've got the original and we can blend between them. So when we publish, we have the two variants and we'll be able to blend between the two variants. - And there was another option of how to show a before and after? - Yep, sure. So in this tour, we don't have, in the Room Editor, we just have the blend. But when we go to, I'll nix this, because it's not a completed variant, it's just the one I was working on. But we've got our two main variants there. If I go to the Tour Editor, if I go to the Tour Editor, we've got a choice about how we want to present this in the final UI. So I'm going to go to my Design View and here I can decide what kind of comparison I want. So here's my tour, move around it. It's the one shoot I've got there. If I go side-by-side at the moment, I'm saying the original. Original, obviously I want to be original versus renovated. So we've got the two different variants there. And there could be a long list. It could be a series of dates of construction phases or whatever. It's not just one or the other. So we're actually loading up the second one. So now I've got my side-by-side comparison. - Awesome. - So that's how that works. - Okay. Could we finish up on how to do a 3D virtual tour of a space that has not yet been built? - Yes. So let's say we're in Revit, we have an architectural design, this is one of the Revit demo scenes. I'm not a Revit user, so I'm a bit out of my depth in Revit. And it's not a simple application. The way it works is we have a plugin, which would be, it's in here in the add-in section. And what you do is you're going to create, for your 3D views, you're going to create a camera called Metareal, something for every camera that you want to render as a 360 panorama. And then you're going to call our add-in, which I don't have because I'm in Revit V22 and I had trouble installing it in V22 today, so I'm able to show the Revit side of it and the Metareal side of it. I can't go through the export process right now. - So it suffices to say there's a few options here. If you're working in any CAD program, Revit, SketchUp, that enable the export of a 360, either through the Metareal Stage add-in integration, or if you can just export 360s on their own. - Right. - That's kind of one module. The second is you may literally work with a virtual staging company, or [www.WGAN.info/vsi] that lets you take your existing spaces and virtually stage them. And the question I've actually asked Gareth is, well how do you do pre-visualization of a space that has not been built, but it also applies to virtual staging where you've gotten 360s -- you've virtually staged existing 360 panorama. - Yeah. From a service provider. - The workflow from here is going to be identical. - Yeah. So in this case, we have a plugin for Revit. So you can export, it'll kick off an Autodesk Cloud A360 render. It'll take the panoramas, it'll take a low version of the mesh and package that as a zip file that we can just import directly into Metareal. If you're working with 3ds Max or SketchUp, you have a few more steps because you actually have to create the zip file yourself. But it's not hugely complicated. So if I go into this, this is the Metareal project that results from that course. So we've got four cameras in that scene, and we can see those panoramas there. And we've also got a geometry which we've imported, which is a mesh geometry that's from Revit. And we've also imported the pano coordinates from the Revit environment. So our plugin basically generates those three files. - So I want to ask you to say this a little differently, Gareth. Because most of us would answer real estate photographers, they will not have worked with Revit or even SketchUp. But the key thing for them to know is if they're working with an architect ... What are the words or language that you would like to say to the real estate photographer about how to get the 360s out of Revit, SketchUp, et cetera. What is it that you need to go to the next step? - So at the very least, you just need to render the 360s and you can upload them to a tour just like the 360 that you photographed. And our team will process them and build a tour. With Revit and if you want to go a little bit further, you also have an opportunity to actually bring the geometry from the architectural model as well. And so here you can see we've actually, I don't know if you can see the lines, but we actually got the mesh geometry from Revit. So we actually have the architectural model, which is obviously very low resolution. And then we have the beauty parts and high quality rendered images which we're able to combine together. So I'll say that again. At the minimum, all you need to be able to do is render 360 images. And I know you can do it with SketchUp. I know you can do it with 3ds Max. I know you can do it with Blender. I know you can do it with Revit. In Revit's case you have to use the cloud renderer to do 360s. But it's perfectly fine. And all you need to do at a minimum is to be able to upload those to Metareal. If you want to go further as we're doing in this case, you can actually upload the mesh, as well and you can align the 360s with the mesh. In the case of Revit, we have the ability to export the panorama locations relative to the mesh, so that there isn't even any alignment to do. It's all done for you when you open the scene. And so- - I kind of like to say something slightly different, which is if you're a real estate photographer and you're working with an architect, the architect may be having a conversation with you about shooting the space after it's totally built. The key thing to know is -- the architect is pre-visualizing the space. And you can create a 3D virtual tour for, let's call it a synthetic environment, pre-built/doesn't exist. All you need to do is ask the architect to say, "hey, just export the 360s from your CAD program and we'll take it from there." - Absolutely right. - That's probably the simplest and easiest. - Yeah. - If there's an architect that's watching today's show, then you totally get it. Gareth is describing some extra features along with a Metareal Stage plugin for Revit that not only enables you to export the 360s, but export it with the geometry that makes the next step a little bit more precise and easier workflow for everyone. But from the photographer standpoint, because we don't want to lose the photographer with their eyes glazed over, "oh my gosh! I can't imagine giving the architect credentials to hook-up to their Revit file and then export and then I'm not sure what I'm asking for." So again, for a photographer, just tell the architect, "easy-peasy, lemon-squeezy, just export the 360's out of your CAD file. That's all I need. We can take it from there." - Yeah. Yeah. And there's the potential, obviously with the variance that you could have a tour that has photographic 360s of how the place is -- the location is now -- and then have a variant that's the remodeled version, that's the pre-visualization and actually be able to compare side-by-side using the variance workflow we just looked at. I don't have an example of that to show you. - Yeah,it is not necessary to show an example, but I would just say I can't overemphasize how important visibility is because it opens up the possibilities of showing before, after, before it's built, how it looks virtually staged, and what a side-by-side comparison looks like. So Metareal Stage gives you the ability to do all these magical things. And for our real estate photographers, super helpful to know that you can create a virtual tour that is pre-visualization of a space that hasn't even been built yet. And that's huge. if you've ever looked at a blueprint, and that's not your thing, it's impossible to understand the space. So often you have an architect who totally gets it and can visualize what it looks like. But only when you output all these things as 360s imported into Metareal Stage look at it and go, "oh, well I'm looking at the space." "I can walk around it." "I understand the space." "I can have a conversation with the architect." "I don't have to understand a two-dimensional blueprint." - And you can literally walk around it because all those virtual tours, if you open the link up in any VR headset that supports WebXR; just works. Everything is WebXR compatible. - Yeah. Which is great because then you literally can say to the architect, "I was walking down the hallway and I really didn't like how something blocked the view." "Could you remove that?" "Could you lift up the ceiling?" "Could you widen the walls?" So now you can truly visualize the space. And that really is some of the secret sauce or magic of Metareal Stage. Not just for existing spaces, but for spaces that don't yet exist. Or virtually stage spaces. Or for that matter, that you want to have all your 360s that you shot cleaned up either by you, or using a third-party service to clean up your 360s and then import it back into Metareal Stage. Gareth, what's coming down the pike for Metareal? - So well, the next thing that's coming and there's kind of the big news, which I think is going to be exciting for folks. We had a lot of people saying, "okay, yeah, but I have to upload the panoramas and that's a hassle, because I've got to save them and I've got to move the files around." So coming in, I would say coming in the summer 2024, I'm not sure exactly when it's done, but in the summer we've got a mobile capture app coming. So that basically gives you Metareal on your mobile device. It'll be Android and iOS compatible. And basically that will be your log into Metareal Stage in the app and you'll be able to shoot and control your camera directly from the app. It will create the Metareal Stage project and you'll be able to submit the job right there from where you are doing your shooting. And this gives us the opportunity to do a few other interesting things. You'll be able to add annotations right there when you're doing the shoot. So you can make notes in the panoramas on the objects, you can mark out dimensions and then you can kick the job off right away from there. So have it processed. So next morning you're back at the office, you've got a finished process job ready, they're waiting for you. So Metareal Stage Capture is coming this summer. - Summer 2024. Great. Look forward to doing a new WGAN-TV show with you specifically on Metareal Stage Capture. You can sign up for free, no credit card necessary at: www.Metareal.com www.Metareal.com Your first live tour is free. Our first show, if you missed that somehow you managed to get through this show, go back and look at Part 1: Features and Benefits of Metareal Stage Version 2.0 for Creating 3D Digital Twins. Please go to www.WGAN.info/MetarealOnWGAN Gareth, thanks for being on the show today. - Thanks, Dan, real pleasure talking with you again. And yeah, hope you come back soon. - Summer 2024. We've been visiting with Metareal Co-Founder and CEO Gareth Morgan. For Gareth, I'm Dan Smigrod, Founder of the We Get Around Network Forum. And you've been watching WGAN-TV Live at 5. |
||
| Post 2 • IP flag post | ||
Pages:
1This topic is archived. Start new topic?