


Videos: Matterport Axis SmartPhone Rotator: Setup-Calibrate-Scan-Overview16400
Pages:
1
 WGAN Forum WGAN ForumFounder & WGAN-TV Podcast Host Atlanta, Georgia |
DanSmigrod private msg quote post Address this user | |
| Video: Matterport Axis: Unboxing, Setup and Calibration with Amir Frank | Video courtesy of Matterport YouTube Channel | 8 February 2022 | Part 1 of 2 Video: Matterport Axis SmartPhone Rotator: Scanning and Overview with Amir Frank | Video courtesy of Matterport YouTube Channel | 8 February 2022 | Part 2 of 2 --- [Updated: Please see below for revised Matterport Axis video - @DanSmigrod 9 May 2022] --- Video 1 of 2 | Source: Matterport YouTube Video --- In this video, Amir unboxes Matterport Axis and thoroughly walks you through calibrating your phone with Axis to get the best results possible. Amir also talks about the tripod that comes when ordering the Axis/Tripod bundle. At the very end of the video is a quick trick for finding the precise ruler marking to accurately align your phone’s camera with the vertical axis. You can use this table to find the alignment guide number for your phone. Even if you're using a case, this won't be far off, but at the very end of this video, Amir does cover how to precisely calibrate to your phone. iPhone 11............................4 iPhone 11 Pro.....................2.5 iPhone 11 Pro Max.............2 iPhone 12............................2.5 iPhone 12 mini....................4 iPhone 12 Pro.....................2.5 iPhone 12 Pro Max.............2 iPhone 13............................4 iPhone 13 Mini....................4 iPhone 13 Pro.....................2 iPhone 13 Pro Max.............2 --- Video 2 of 2 | Source: Matterport YouTube Video --- In this video, Amir walks you through scanning a model using Matterport Axis with your smartphone and then overviews the final results and compares Smartphone Capture with and without Axis to a 360 camera. -- Your thoughts? Dan Transcript (Video 1 of 2 above) Amir Frank: If you're watching this video, you are just as excited as I am about Matterport Axis. In this 2-part video series, I will start by unboxing Matterport Axis and getting into all the nitty-gritty about what's in the box, how to calibrate everything and get everything set up for your skin, and then in video 2, I'll take you on-site where we can go ahead and scan through the property using Matterport Axis, and at the end of that video, we'll walk through the completed process model to see what Matterport Axis can do. This is Matterport Axis, it is a motorized mount that allows you to attach your phone, whether you're using Android or iPhone. Currently, it is only available for iPhone, but that will change very soon, and I'll go over the benefits and everything in a little bit. For now, let's go ahead and pop this guy open. This is what you're going to see in the box over here, we've got a quick start guide, USB cable for charging. This here is the motor mount. You've got the USB port for charging right here in the back, and at the bottom, you've got a standard quarter-inch 20 thread that will fit most tripods, including the tripod that comes bundled with this unit or you can take this little adapter out and you've got a standard three-eighths 16 tripod if you're using more pro level tripod that's going to fit there. I'm going to go ahead and pop this back in and just set this aside. Let's see what else we got. We've got a remote control right here that already comes with a battery inside and the little arm. This is going to connect to the camera, of course, and this base plate right here connects to the motor mount. If your unit came with a tripod, this is the tripod that it came with. You can certainly use just about any tripod that you want. If you already have a tripod, feel free to use that instead, but if you do get the bundle, this is the tripod that comes with it and there are a couple of things that I feel are really important to point out before you go ahead and use this tripod. First of all, you'll notice that there are four quick-release little clamps here. I'm going to undo three of them without undoing the fourth. I'm not going to use this top section and just pull these all the way out and this is going to be the height of the tripods as far as the base is concerned. What a lot of people are going to do is put this all the way out, something like this, that gives them a really nice slide foot. However, it's not quite that simple. This is actually not going to be the most stable position. Not only that, this is a little bit wide for pretty much every staircase that I've ever been on. It's not an ideal position to bring this is wide as possible, instead, what I'm going to do is bring this up and have it right about here. I wanted about an inch, two inch and a half below this bottom clamp and then I can go ahead and tighten it. I want to definitely make sure that this little bottom unit right here, this thing is not touching the table, of course are the floor and your case. That's about it, and the reason why this is going to be a lot more stable is because this point right here where the three legs come together is much higher up. That's going to make the center post be a lot more stable. That's it, this is how you want it, just remember that the three legs come up to about an inch two inch and a half below the bottom clamp. Tighten that down, make sure it's tight so it doesn't move and the three bottom sections are fully extended. This is going to give you a tripod that is about 4.5 to maybe 5 feet high when the cameras placed on top. Now let's talk about Matterport Axis itself and how to properly set it up and calibrated now that we've got our tripod all ready to go. I'll take the motor mount right here and it has the power button. It's got four little LED lights right here that gives you an indication of the battery level and here we have the little arm clamp that's going to attach to the motor mount as well as the phone and the remote control. By the way, this is magnetic and can stick right there. Let's worry about this and my phone, which I have right here. In my case I have an iPhone 12s Pro Max. It's a pretty big phone. I'm going to have to open this up almost all the way. Amir Frank: The first thing that I'm going to do is look at the back of this, the wide-angle lens with my iPhone is this lens right here and I want to line this up with the center of this pivot point. That looks about rights there. I can just go ahead and clamp this into place. With the lens and the center access of this pivot point lined up, I can go ahead and now connect this to the Matterport Axis motor mount, and it has an arrow right here along with this little turn knob that turns it down and I want to make sure that the rulers are facing in the direction of that arrow. That's going to help me out. Amir Frank: Just loosen that up a little bit. I also have an arrow over here on this side, it's right there. It's a darker gray arrow. What I need to do is line up the lens with that arrow. I'm going to look at It and just do my best. It doesn't have to be absolutely perfect as close as you can get it is going to be just fine because the software is still doing a really great job in compensating for anything that has just a little bit off, I wouldn't worry about it too much. In the description below, I also linked to a table that I'll tell you exactly what number to line the triangle up with, depending on what phone you're using. Of course that is a phone without a case. In my case, I have a case, it's a thick case. It's not going to be perfect because of that, at the very end of this video, I will go ahead and show you what I did to really get it perfectly lined up. Now you've got both the horizontal and vertical axes completely aligned and the only thing that's left is the pivot in this area right here. What I can do is just loosen it up a little bit and bring it down to roughly 15 degrees and then tighten it up. I might need to adjust this pivot point just a little bit more onsite and I'll go ahead and show you how to do that when we get there but for now, you're set, the only thing that's left is to attach this to your tripod and we're ready to go. The last thing that I wanted to cover is how to put this thing back in the case because I have a slightly larger phone. My bracket here that's going to hold onto the phone is wide open. What I could do is just close this all the way. That could take a little bit of time than I have to open it up again. What I'm going to do is first of all, make this nice and flat and basically just take this and I don't have to put it back in here. I can just go ahead, throw it right there along with the USB cable and we're done. Amir Frank: I hope you found this video helpful and we will see you in the next video where I'll take you through and scan the property. Amir Frank: If you've stuck with me this far, you are interested in calibrating your phone's lens very precisely with Matterport Axis and this is how I went ahead and did that. Normally, your phone is going to be in Matterport Axis like this. If I flip it over, you can see that the backside of the phone was facing right here and what I want to do is flip the phone over, but I don't want to rotate it like this. What I want to do is flip it so that the screen is facing right, like that. Now what I can actually go ahead and do is turn this, open up the camera app, and you can see, I want to make sure that I'm using the wide-angle lens, so I'm going to select that. That's very important. This is pretty straight. These little grippy pads sometimes grip the phone at a slight angle so I can loosen that up. Make sure that it is nice and straight and you see by the gap here between the phone and this arm. Once I'm comfortable with that, let's go ahead and move this just like that. This is the idea. I'm using the wide-angle lens because that is the lens that's going to be used when I'm in capture. If you don't have a wide-angle lens, that's fine. Just use the regular lens because you don't have a wide-angle lens, that's the lens is going to be used. I want to take a picture of this. I'll go ahead and snap a shot right there and go ahead and take this now into something like Photoshop. I've got my image open in Photoshop and very simply, I'm going to go into the rulers here and grab a guide and it's just going to snap right into the center of that and I can see that perfectly centered with this lens is going to be one eighth of an inch or whatever this marking is below the two. I know that this is exactly where I needed to align it. I can take my phone out now and very easily, line this up right there and just tighten it down. Now when I put my phone back in, its going to be perfectly aligned and all I need to worry about is the vertical axis right here. There you go. I really hope that will help you sleep better at night. Transcript (Video 2 of 2 Above) Amir Frank: We are on site. In the previous video, we went ahead and calibrated the Matterport to access with my phone. Now, I'm just going to go ahead and set everything up. Just as a quick reminder, this is my tripod that I'm using, if you have a different tripod by all means, go ahead and use it, that's fine. But this is the one that comes with the bundle and what I'll do is just open up the legs as again I mentioned before, that the point where the three legs meet is about one-half to two inches and maybe three or four centimeters from the bottom quick release clamp and then I can go ahead and tighten that down. Release the three lower quick release clamps and just extend this all the way. Again, as I mentioned in the previous video, I'm not going to use the fourth extension here to make this any taller because this is the thinnest extension and is going to make it less stable than I would like it to be. Now we've got the Matterport Axis clamp right here for the phone and I'll go ahead and attach this right now to open this up just a little bit. Right now, the most important thing is just to line up my wide-angle lens that's being used on this phone with the center area of this pivot point. I'm just going to push this up a little. Again, I'm just eyeballing this, it does not have to be perfect. Put that in place. If you stayed with me to the very end of the last video, you saw how I was able to very accurately figure out where on this ruler scale, I need to align this clamp with the motor mount itself with the Matterport Axis in order to get this perfectly horizontally aligned with the lens. I'm just going to go ahead and line up that marking with my arrow right here and right about there. I have this little wheel right here at the top of the tripod, makes it really easy. The last thing at this point is to go ahead and pivot the camera along this pivot point. I'll go to the hood, loosen this up and it's going to be about 15 degrees, which is marked at the top. You can see it. But I won't know exactly what that's going to look like until I've got this in Capture and ready to go. Because I'm not connecting any external cameras, this is really simple. I'm just going to go ahead and go into the Capture app, hit the plus sign and save that. Of course, before access can connect, I need to turn it on so I'll press the power button there and you saw that the camera just kind of moved a little bit. What's happening there is that the lens in the front is lining up with the 0 degrees of Matterport Axis. You can see little degree markings all the way around the top and that basically doesn't really affect anything very much, but, and do need to pick this up and turn it so that I can see the screen. Now I want to press the iPhone button just above the skin button here and hit Connect Access. I'll go ahead and press Connect. Makes sure that Bluetooth is enabled on your phone, of course and now all I want to do is connect to the remote control. Let me get the remote control here it is just a long press on the button of the remote control, you'll see the blue light starts to blink and it should automatically connect. I see that it says remote connection failed. I'm going to go ahead and press retry. That would went ahead and connected. I'm ready to go at this point. I can go ahead and press the remote button. This is the first time that I'm doing this so it's going to walk me through a little getting started guide here. Now I can see that the dot and the circle are very well aligned. When I adjusted the pivot point right here at the top, I actually did a pretty good job. But if it's not aligned, just go ahead and loosen that and you can adjust accordingly at this point. Now they're ready to go. I can press the remote button again to start my scanned. Amir Frank: I'm just going to go ahead and walk around the backside of the camera as it scans. The other option, of course, because I have this remote, is that I can just go ahead and hide. Amir Frank: The first scan has been done. I can go ahead and pick up the tripod, move into the next position and scan again. Amir Frank: As you saw, I was able to use my smartphone just as you would 360 camera might not be quite as fast as capturing with 360 camera but using Matterport to access it certainly is just as accurate. Now we'll go ahead and upload all this data to my account so it can go ahead and process and I'll see you back at the office where we can go ahead and look at the model and compare this to just using a smartphone without Matterport Axis or other 360 cameras. Alright, I'm back in the office and uploaded all the metadata. Everything is processed in order to go and just wanted to dive into this model with you and show you what we've got and just kind of compare this to other capture methods like using a 360 camera or just your smartphone by itself without Matterport Axis. Here we are in the model I can go ahead and walk around just like we would with anything else. I have got be honest, this is looking really good to me. Looks like a great doll house with everything in place. I could use the trim tool to get rid of some artifacts in the ceiling right over here. But other than that, everything looks really great. It's in place and this looks like a proper doll house. As far as the experience when scanning using Matterport Axis versus just hand-holding your smartphone versus just using a 360 camera. Well, for one Matterport Axis is significantly more reasonably priced than even your lowest end 360 cameras at $300. As I said, it is a companion device to your smartphone that helps make it a more precise capturing instrument. What you're doing with Matterport Axis is really removing the human element from the equation. You'll end up with a high-quality model that has the measurement accuracy of a 360 camera. You can also scan faster with less fatigue and a lot more consistency.. All these really benefit your smartphone capture capabilities. The downside, however, you're no longer looking at something that just fits in your pocket therefore keep that in mind. This is a device that you're going to have to put in a backpack or something like that. It's certainly not a large device by any means. It does fit in my jacket pockets and the case that can easily squeezed into my backpack, but it's definitely more to carry around. It's no longer just the phone that fits in your pocket. Also, as far as image quality is concerned when compared to 360 cameras, in my opinion, because I am using my smartphone, you can see in the example, the HDR image quality is really good, I don't see any kind of blowing out in the window over here or over here. I still don't have too dark of an interior as I walk through. Very nice image quality when compared to other 360 cameras, and more consistency when compared to not using Access and just using your smartphone by itself. That's really it for using Matterport Axis and I hope this two-part series was able to better explain how you set up calibrate and use Matterport Axis with your mentor port scanning jump. Of course, if you do have any remaining questions about Matterport Axis, you can check out our support page at www.support.matterport.com. |
||
| Post 1 • IP flag post | ||
|
WGAN Forum Founder & WGAN-TV Podcast Host Atlanta, Georgia |
DanSmigrod private msg quote post Address this user | |
| Video: Capturing with a Smartphone - Matterport for Mobile, Handheld to Axis - with Mark Carroll | Video courtesy of Mark Carroll YouTube Channel | 9 February 2022 | ||
| Post 2 • IP flag post | ||
|
WGAN Forum Founder & WGAN-TV Podcast Host Atlanta, Georgia |
DanSmigrod private msg quote post Address this user | |
| Video: Matter Hacks | Matterport Axis Unboxing | Video courtesy of Actionable Insights YouTube Channel | 2 March 2022 | ||
| Post 3 • IP flag post | ||
|
WGAN Forum Founder & WGAN-TV Podcast Host Atlanta, Georgia |
DanSmigrod private msg quote post Address this user | |
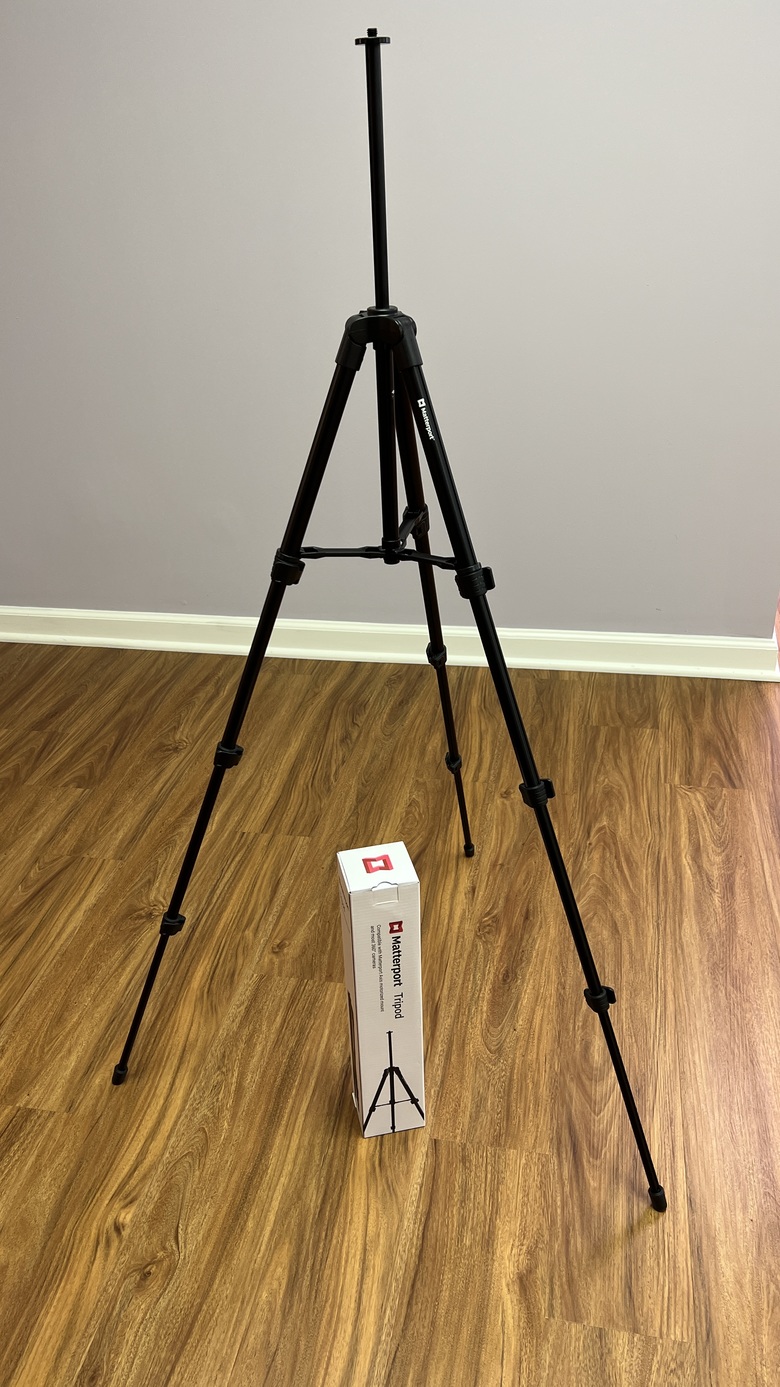 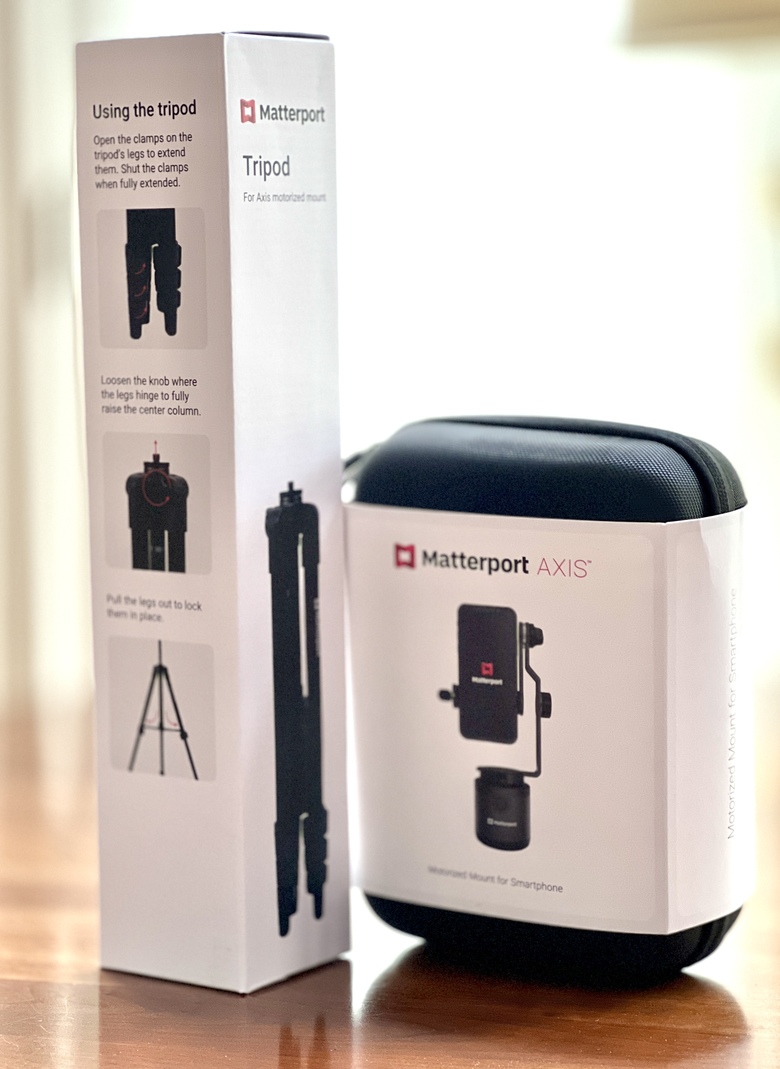 Matterport Tripod[/url] Hi All, As first posted by @lilnitsch in the WGAN Forum, the Matterport tripod that ships with the Matterport Axis is DIFFERENT than the one Matterport featured early on in the Matterport training video first posted by Matterport on 8 February 2022 (see Matterport Axis training videos in first post above). ==> Videos: Matterport Axis SmartPhone Rotator: Setup-Calibrate-Scan-Overview I will plan to ask @lilnitsch and @Dataventurer) for their thoughts about this Matterport tripod on WGAN-TV Live at 5 this Thursday, 14 April 2022. Dan |
||
| Post 4 • IP flag post | ||
|
WGAN Forum Founder & WGAN-TV Podcast Host Atlanta, Georgia |
DanSmigrod private msg quote post Address this user | |
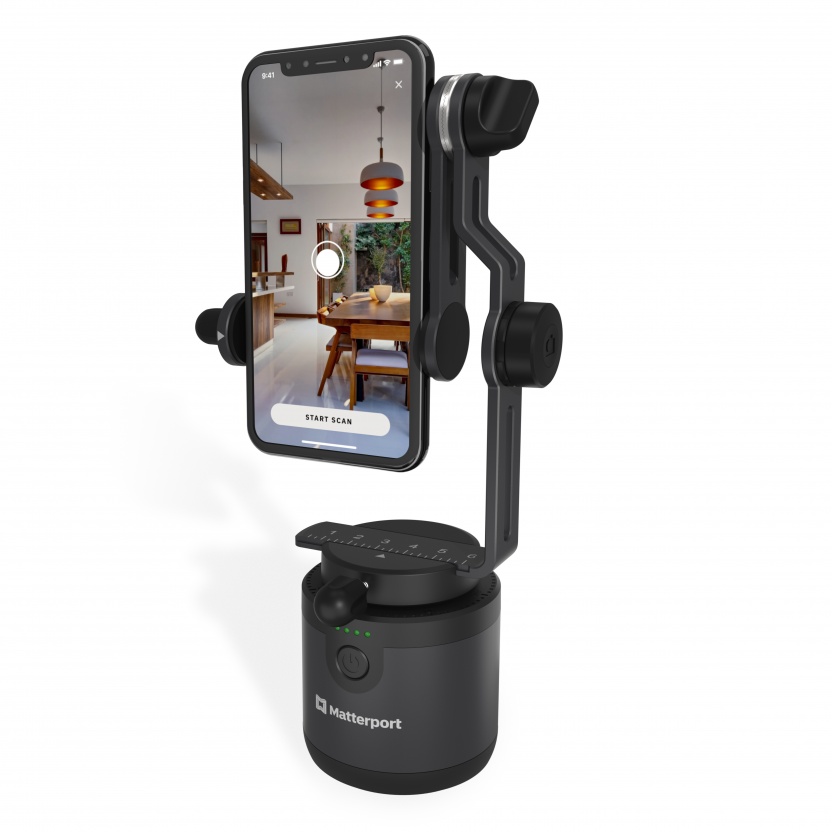 Matterport Axis smartphone rotator | Image courtesy of Matterport  Text Me 5 Minutes Before WGAN-TV is Live | WGAN-TV: Matterport Axis Motorized Mount Smartphone Rotator: 1st Impressions | Guests: Gilroy, California-based Dave Avilla, Real Estate Photography and Coldwell Banker Realty Agent | www.CBnorCAL.com | CalDRE # 01075392 and Jeff Nitschke, Owner, CaptureNW covering North Idaho and Eastern Washington State | www.CAPTUREnw.com | Episode #141 | Thursday, 14 April 2022 -- Hi All, Thank you for watching this WGAN-TV Live at 5 (5 pm ET) today (Thursday 14 April 2022). Best, Dan |
||
| Post 5 • IP flag post | ||
|
WGAN Forum Founder & WGAN-TV Podcast Host Atlanta, Georgia |
DanSmigrod private msg quote post Address this user | |
| Video: Matterport Axis: Everything you need to know (Updated 28 April 2022) | Video courtesy of Matterport YouTube Channel | 28 Aril 2022 Related WGAN Forum discussions tagged: Matterport Axis Buy Matterport Axis (Amazon) Transcript (video above) Amir Frank: Welcome Matterporters. This video is all about Matterport Axis. What we're going to be talking about today is this guy right here. Let's go ahead and unbox it. This is what you're going to get. When you open it up, you're going to have a few things inside. You've got the motor mount, the arm clamp, a remote control a 3/8-1/4 inch tripod adapter, and a USB charging cable as well as the quick start guide. Here is your motor mount. In my case my thread adapter is right here in the bottom, let me take this out. There it is. This is what the 3/8-1/4 inch thread adapter looks like and if it's not in the bottom of your motor mount it's going to be in a little ziplock bag, right in your case. Because I'm using the bundled tripod, I actually don't need this thread adapter, however if you are using a different tripod with a 1/4 inch 20 thread, this adapter is going to come in very handy. Now before I go ahead and set this up, let's check out the tripod. This is the tripod bundled with your Matterport Axis if you did go ahead and choose the bundled package with a tripod. Again, you can definitely use your own tripod if you want, but this is the one that is currently bundled with Matterport Axis. No different than most tripods out there, the legs just expand out like this and you have three quick release clamps that allow you to extend the legs. I'll go ahead and unclamp all of those, extend the legs all the way and clamp them shut, I'll do that to all three legs. Right now the three legs are fully extended, but the center post is not extended all the way, which we definitely want to do that. At this height, the tripod is about 37 inches and that is well below what we recommend. I'll go ahead and loosen the center post just by twisting this center posts right here and also this knob it needs to be loose, so It's two things, this knob as well as the center post need to be loosened up, the center post comes up, we can re-tighten it with this knob right here, as well as securing it in place with this center post right there. Right now my tripod space is at about 45 inches which is great. With the motor mount I'm going to go ahead and thread this on right now. I find that it's a lot easier to thread the motor mount on before attaching the clamp and camera. Now, we'll go ahead and take my clamp out. Before attaching this to the motor mount, I'm going to go ahead and attach my phone to the clamp. My phone is an iPhone 12 Pro Max with a case on it. It is pretty wide. I need to go a little bit more. Before I go ahead and clamp this shut on my phone, tightening it into place, I want to make sure that my lens is properly aligned with the center of this horizontal pivot point. If you don't know which lens on your camera is the ultra-wide angle lens or if you don't have an ultra-wide angle lens, it's just a normal lens that's going to be used by capture. But if you do have an ultra-wide angle lens, that's the lens that capture is going to be used. Again, if you're not sure which one of your lenses is the ultra-wide angle lens you can go ahead, turn on capture, start a scan so that you can see what's going on through the lens and just use your finger to cover each one of the lens until you find the one that's covered up. Pro tip, go ahead and clean the lens with a lens cloth after you've done that. In my case, the ultra-wide angle lens is this one right here. I just need to make sure that this lens and the center of this pivot point are aligned. I just need to eyeball it. It doesn't have to be perfect, but as close as possible is definitely recommended. Now I've got the lens aligned with the horizontal pivot point and I can go ahead and place the clamp into this unit here. You'll notice that there is a white arrow on the top of the motor mount and a ruler on the base of your clamp. Depending on your phone and whether you're using a case or not, that will determine what ruler marking is going to line up with the arrow. In order to find out, I'm looking to align the ultra-wide angle lens with the center of the motor mount. On this side, I have a dark gray arrow here, I also have this knob right there, and then basically you're going to try and eyeball just to see that they are pretty close. Right there it looks pretty good. For anybody who wants to get this extremely precise, I do have some tips on how to do that, and I'll get to that at the very end of the video. Now with the phone connected to the arm clamp that is connected to the motor mount that is connected to my tripod, I've got my lens height at 54.5 inches, which is just short of the recommended 55 inches. That is perfectly fine no one will ever notice that half inch difference. This little compact tripod really does do a great job at setting your camera lens at an appropriate height for capturing your digital twin for many different use cases. Now I have properly aligned the ultra-wide angle lens with the horizontal and vertical Axis and I can go ahead and turn it on. Right here in the front are four little LED lights that give me a rough estimate of what the battery level is for Matterport Axis. Now it is simply a matter of turning on my phone and accessing Matterport capture. Press the plus sign down here in the bottom to create a new model. My phone automatically recognized Matterport Axis, so you can see down here in the bottom in the camera button, it says iPhone Plus access. In order to use the remote control, it's just a long press on the Capture button in the middle. Hold that down, and after about a second, you'll see the blue light come on. Now you can see that the camera button, it says iPhone plus Axis plus remote and I know that all the devices are talking to one another. You can also see in the top-left corner that it says Axis at 86 percent battery and the remote is at 33 percent battery. This remote does use a very simple watch battery, it's easy enough to just take the bottom right off and access the battery that way. Now I'm basically ready to scan, that's all there is to it. I'll go ahead and press the "Remote" button and initially it'll say, "Get Started", it's just the first time that I'm using this with this model. I'll just hit, "Get Started". Now because I don't have this tilted down just a little bit as I should, it's giving me this warning at the bottom and all that means is I need to loosen up this pivot point that we talked about before, move this down about 15 degrees. As long as this white dot is pretty much in the middle of that circle, it doesn't have to be perfectly centered, you can go ahead and scan. Press the "Remote" button a second time to begin scanning. As you can see, setting up your iPhone with Matterport Axis is very simple and it's really no different with your Android device. As long as you connect Matterport Axis through the capture app on your Android device, you won't be required to enter a password. However, some Android devices, if you don't do that, if you connect through the Bluetooth settings in your Android device, you will be required to insert a password and that is eight zeros. It's just the number zero eight times in a row. Since you have this remote control, you can definitely go ahead and hide behind the corner when Matterport Axis is rotating or you can go ahead and walk around the screen side of your phone. As with any other capture devices, however, anytime you are capturing whether you're hiding around the corner or walking around the backside of the camera, look out for yourself in reflections. If you can see the camera, the camera can see you. But basically that's really about it. Scanning with Matterport Axis is really no different than scanning with any other device. Three sixty is of course captures the entire spherical image at once. This is more like the Matterport Pro 2 in that it does take several images to complete the full 360 degrees sphere. I went ahead and use Matterport Axis to capture this property. Let's go ahead and check out what that looks like. Amir Frank: You can see in that clip just how easy it is to capture using your smartphone when you are using Matterport Axis. So much more easy and consistent than if you just use your smartphone alone. Let's go ahead and check out that model that I captured. You can see as I move around, the image quality is really quite good. I don't see nearly as many of the stitching artifacts and that's thanks to the consistency of the rotation that Matterport Axis provides. I can also look back at the doll house and see that this looks like a great dollhouse and really a great model altogether. That's really it, that is Matterport Axis. You can see how easy it is to set up and align your phone with the device itself, as well as the benefits that using Matterport Axis provides you. For anybody using smartphone capture, this is a great companion device. It truly allows you to scan a lot faster, a lot more precise, and with a lot less fatigued than you would without using it at all. Not only that, the image quality of your digital twin is going to be really stunning because after all you are using your phone's camera. If you do have any more questions about Matterport Axis checkout our FAQ@support.matterport.com. If you've stuck with me this far, you are interested in calibrating your phone's lens very precisely with Matterport Axis and this is how I went ahead and did that. Normally your phone is going to be in Matterport Axis like this and what I want to do is flip the phone over, but I don't want to rotate it like this, what I want to do is flip it so that the screen is like that. Now what I can actually go ahead and do is open up the camera app. This is the idea. I'm using the wide-angle lens, because that is the lens that's going to be used when I'm in capture. If you don't have a wide-angle lens, that's fine just use the regular lens because you don't have wide-angle lens, that's the lens is going to be used. I want to take a picture of this. I'll go ahead and snap a shot right there, go ahead and take this now into something like Photoshop. I've got my image open in Photoshop and very simply, I'm going to go into the rulers here and grab a guide and it's just going to snap right into the center of that and I can see that perfectly centered with this lens is going to be whatever this marking is below the two. I know that this is exactly where I need to align it, which is great, I can take my phone out now. Very easily, line this up right there and just tighten it down. There you go. I really hope that will help you sleep better at night. |
||
| Post 6 • IP flag post | ||
Pages:
1This topic is archived. Start new topic?