


Matterport Video: Scanning Outdoors with your Matterport camera14110
Pages:
1
 WGAN Forum WGAN ForumFounder & WGAN-TV Podcast Host Atlanta, Georgia |
DanSmigrod private msg quote post Address this user | |
| Matterport Video: Scanning Outdoors with your Matterport camera with Matterport Marketing Content Manager Amir Frank | Video courtesy of the Matterport YouTube Channel | 22 January 2021 Matterport Video: Scanning Outdoors with your Matterport camera Hi All, From the Matterport YouTube Channel: Learn the best practices for scanning outdoor spaces using your Matterport 3D camera and the Matterport Capture app on the iPad. While outdoor scanning is not an officially supported feature, your camera can still scan high-quality outdoor spaces with a few tips and tricks. Discover the difference between 360 Views and 3D scans and how to control sunlight for outdoor scanning. Source: Matterport YouTube Channel Questions about Matterport scanning outdoors? Tip: WGAN Forum posts tagged: Outdoors Best, Dan P.S. WGAN-TV Training U (in Matterport) --- Transcript (video above) Amir Frank: Hey, Matterporters. I'm Amir and in this video, I'll talk about the best practices for scanning outdoors, with your Matterport Pro or Pro2 camera. Keep in mind, these cameras are designed to scan indoors. While you can use it to scan outdoors, it can be quite challenging and potentially lead to alignment issues, which is exactly why outdoor scanning is not an officially supported feature. However, you can still use them to scan outdoors. For example, you may want to scan a patio, deck, pool, walkway, or exterior stairs. You may also need to scan a path to a detached garage, garden, shed, or guest house. There are three key things to remember when scanning outdoors. First, use 360 capture whenever possible. The 360 capture is just like a normal 3D scan, however, it only collects the 2D visual data and does not collect 3D model data. Because it's not collecting model data, a 360 capture is not aligned or connected to the other scans. Amir Frank: Your visitors can access these 360 captures through pins placed in the dollhouse or portals as they navigate through the model. 360 captures are great for getting the curb view or any isolated spot outside the main structure. If you just need one or two outdoor shots, a 360 capture may be the best option. Second, save outside scans for last. If you want to capture a patio or other close-by outdoor space and still keep it as part of the dollhouse and 3D model, make it the last area you scan. Scan the entire inside of the building first and then go outside. Saving the outdoor scans to the end, reduces the chance of alignment issues with the indoor scans. The third thing is to scan when the sun is below the horizon. This is right before sunrise or just after sunset, when there is still enough light to see the environment, but not too much ambient infrared light to interfere with the camera sensors. Amir Frank: To understand this concept better and learn more about coping with sunlight, there's a linked video in the description below. And finally, whenever you scan outdoors, pay extra close attention to how scans are aligned in capture. After every scan, look at the capture app to make sure the scan was aligned or placed in the correct position in the mini-map. If it was incorrectly placed, then delete the bad scan, move closer to a properly positioned scan and try again, and remember to shorten the distance between outdoor scan positions. This too will help minimize the risk of misalignment. |
||
| Post 1 • IP flag post | ||
 WGAN Fan WGAN FanCLUB Member Coeur d'Alene, Idaho |
lilnitsch private msg quote post Address this user | |
| I use the 360 view as a last resort if lighting is right the Pro1 or Pro2 can be used on its own: If lighting is less than perfect you can use a 360 camera in conjunction with a Pro camera to connect spaces: |
||
| Post 2 • IP flag post | ||
 WGAN WGANStandard Member Los Angeles |
Home3D private msg quote post Address this user | |
| Amir has summarized outdoor scanning very well, but left out, perhaps intentionally, more info. Perhaps its because MP doesn't want to encourage photographers new to MP to wade into deep water, and perhaps wind up over their heads, a reasonable concern. However, here goes with my own extra tips. I presume others have their own experiences to add. Amir says "do all interior scanning first, then outdoors". Right now sunrise is about 7am here in Los Angeles, and sunset 5pm. This means the only dependable exterior scanning 'windows' are 6-7am and 5-6pm. There's only so much area that can be covered in 2 hours so you may need ALL this time to accomplish it, REQUIRING that you begin the 6-7am period outside. In this event, I begin by opening a patio door, capturing one or two scans inside to "anchor" the interior with the IR depth modeling, and then proceed outside. Remember, before starting, to open ALL doors through which you eventually want to create walking paths. I've done homes with doors to a patio from the kitchen, dining room, living room AND master bedroom. Open 'em all if you want to get through and be sure to use doorstops (or whatever) to lock them in position. This being January, I don't suppose you'll need to worry about this in Minnesota right now, but summer will come again. (NOTE: our kids are complaining about the "cold" weather as temps have "plunged" down to the 50's recently. They grew up in LA!) I use Sun Surveyor app to determine exactly where the sun will be moving all day to assess what areas may be in open shade. For example, if the patio faces north, areas close to the house will never get direct sun, but areas further away from the house will, so I prioritize those areas which can ONLY be scanned before sunrise at 7am. I also note whether there are light-colored walls or a neighbor's house facing back toward my north-facing patio. Why? Because as soon as direct sun hits that wall, infrared contamination will polute the open shade areas I need to scan making IR scanning fail. Just like visible light, IR light reflects powerfully. Amir is right that maintaining accurate alignment outdoors (using IR scanning) is more difficult than indoors. Misalignment is more common, and his advice to PAY ATTENTION TO THE MINIMAP is critical. Errors will occur not only due to infrared issues, but also because there are fewer physical, geometric objects for the IR point cloud to lock onto. SO... When you move back inside, begin where you left off with scans #1 and #2. Build the entire inside model from those original scans, just as if you had never gone outside. If there are small angular errors outside, the MP algorithm havs, for me, always "straightened" the model so multiple inside/outside doors align. Also note whether the home's exterior areas will be in shade extra time after sunrise or before sunset due to tall trees, other buildings, a hillside, etc. These offer you bonus time to scan outdoors and really is the BEST time, as the sky will more likely be blue and some hints of direct sun are visible. It's the "prettiest" time to scan a patio. Now for the secret weapon, my Theta Z1. As MP scanning of a pool will reveal a black hole in the dollhouse model as water is invisible to IR, I watch for the best time, and scan with the Z1 to make water appear. In principle you should be able to scan with the Pro camera in 360 mode, 'convert' this 360 pano to 3D, and get a similar effect. I haven't tried this yet. But I also like the brighter color from the Z1. In both cases, alignment becomes a nightmare. You have to try over and over again, watching the minimap until the Capture finally puts the non-IR Z1 scan in the right place. It helps if your FIRST Z1 is photographed right on top of a previous Pro scan. This helps the Cortex AI "match" the downward image details and find the right spot. Once you have a match, others with the Z1 will find match easier, but errors are still common. This technique requires great patience. I hope these comments help some of the more adventurous WGANers! Here's one of my recent inside/outsides, which demonstrates all the above. If you step onto the patio (it was just at sunrise) and then navigate around the pool clockwise, you'll see I had a path in open shade up the steps to the spa and along the stepping stones on the south side of the pool. This was all done with the Pro camera. When you hit the sunlit part, that's the Z1 in action. You'll notice that the Pro camera part moves nicely and smoothly, then when you step into the Z1 zone, Cortex has interpreted the walls of the house as being objects much closer than reality, so phantom objects "float" in the air as you move forward. No way to avoid that, but it still looks nice to walk around in sunlight rather than the dull colors of twilight. |
||
| Post 3 • IP flag post | ||
|
WGAN Fan CLUB Member Coeur d'Alene, Idaho |
lilnitsch private msg quote post Address this user | |
| @Home3D Agreed ~ This was before the 360 cameras were supported & there may have been a couple 4 letter words muttered: |
||
| Post 4 • IP flag post | ||
|
WGAN Standard Member Los Angeles |
Home3D private msg quote post Address this user | |
@lilnitsch - That's the first time I've gotten winded walking up virtual stairs! My finger needs a rest!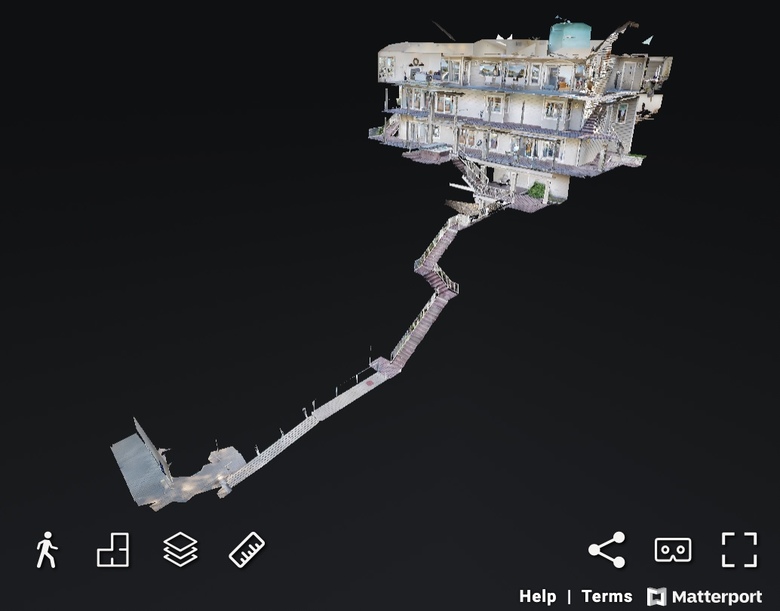 |
||
| Post 5 • IP flag post | ||
Pages:
1This topic is archived. Start new topic?