


Ben Claremont Video: How To Shoot and Upload to Google Street View12788
Pages:
1
 WGAN Forum WGAN ForumFounder and Advisor Atlanta, Georgia |
DanSmigrod private msg quote post Address this user | |
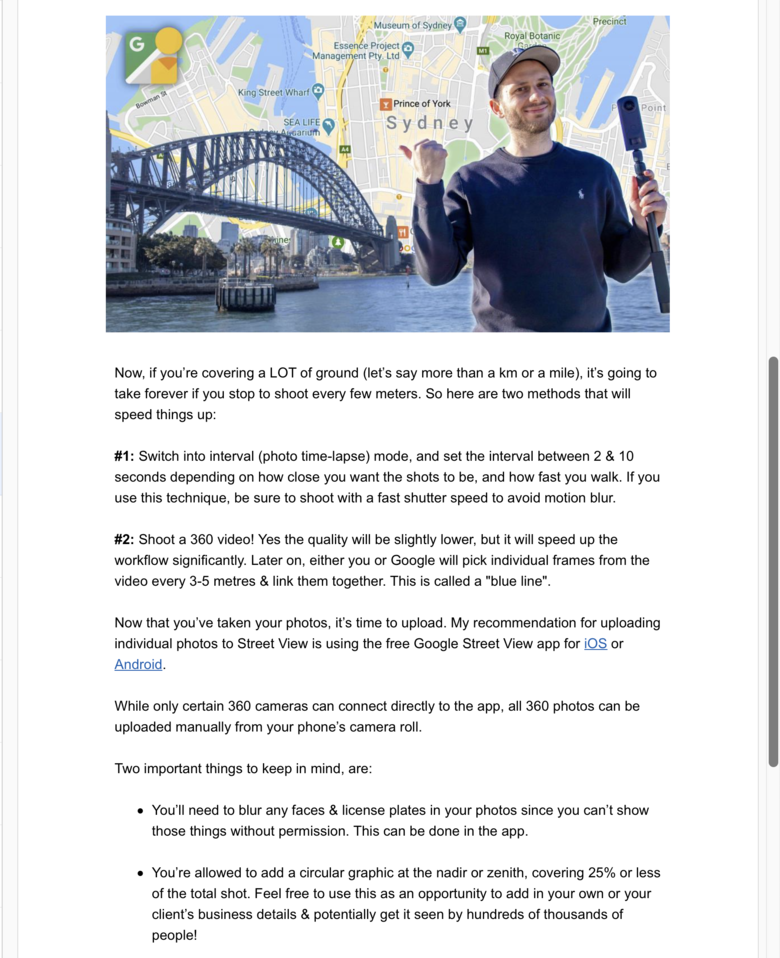
| Video: How To Shoot & Upload to Google Street View | Video courtesy of Ben Claremont | 12 August 2020 Ben Claremont Video: How To Shoot and Upload to Google Street View Hi All, If you are thinking about offering Google Street View 'Blue-Line' map updates, this video (above) by 360 Photography Subject Matter Expert Ben Claremont is a "must watch." Ben offers a TON of value info in a little over 15 minutes. That said, I (respectfully) disagree with Ben Claremont's camera choice and workflow for real estate photographers shooting and uploading to Google Street View if you are considering doing Google Street View "Blue-Line" map updates as an Add On business opportunity. Just because you have a Ricoh Theta Z1 does not mean that's the best solution, if time is money. (Ricoh Theta Z1 is a great first choice - on many levels - for shooting virtual tours for 3D/360 platforms such as Asteroom, Cupix, EyeSpy360, Matterport, Metareal Stage and Nodalview. It is super-fast and super-easy to use Labpano Pilot Era camera because you can upload directly to Google Street View from the camera. And, can upload the 360 photos to your desktop computer first, if you need to add any post production steps (that Ben describes in his video above). Yes. I can appreciate that the Labpano Pilot Era costs (much) more than a Ricoh Theta Z1. Time is money and you will save a ton of time - in your workflow - using the Pilot Era versus the Ricoh Theta Z1. While I have been using Labpano Pilot One (little brother of the Pilot Era) to publish to Google Street View, I (presently) can not recommend the Pilot One for publishing to Google Street View until Labpano resolves problems - that it is aware of - with its GPS module. (GPS is built into the Pilot Era.) WGAN Forum Related Discussions ✓ Labpano Pilot One + GPS Module + Backpack = Google Street View Blue-Line ✓ 10 Backpacks to pair with 360º Cameras to create Google Street View ✓ 10 Things I learned shooting GSV of 3 Atlanta Parks with Labpano Pilot One ✓ WGAN Forum Discussions Tagged: Google Street View | GSV | Pilot One | Pilot Era | Ricoh Theta Z1 ✓ Transcript: Pilot One is a Contender for Real Estate Photographers Below is a transcript of the video (above). What are your thoughts? --- Virtual Tour Pro Course by Ben Claremont | Save 15% with Coupon Code (WGANVTP) and also receive a bonus of 12 free months of WGAN-TV Training Academy Membership --- Best, Dan --- - You probably know Google Street View as the 360 view from Google Maps, where you drop the little peg man onto the blue line and up comes a virtual tour the size of, well, planet earth. Street View is a vital tool to consider as a 360 photographer, since it's connected to Google, which is the most popular website on the internet, with more than two billion monthly active users and while the majority of the Street View map is covered by the Google car, the truth is, anyone can upload 360 photos to Google Street View and it's actually really easy. So in this video, you're going to learn, step by step, how to do it, as well as all the basics you need to know about uploading to Street View. My target today is this big old bridge I found in my backyard. I noticed that a lot of the existing shots on the bridge had stitching errors and exposure issues, so today I'll be taking things into my own hands. Now there are a number of ways of capturing 360 photos for Street View. The most popular one is using the Street View app and taking photos with your phone that turn into something that looks like a 360 Picasso painting. Don't do that. A better method is using a 360 camera that captures the shots in one single click and stitches them together with near perfection. Today, I'm using the Theta Z1, however you can use almost any point and shoot 360 camera, or DSLR setup. For camera recommendations, check out the countless reviews and comparisons I've done on my channel. So traditionally, virtual tours are shot with a 360 camera and a monopod, where you activate the self timer, run and hide, however, the majority of Google Street View is made up of outdoor shots, meaning it's much riskier using this method outside, because even with the slightest gust of wind, it could cause the monopod to blow over and smash the lens. Ask me how I know. So while I would recommend using a monopod if you're shooting indoors, the majority of the time, it will be too risky to use one outdoors, so a safer option is to put your camera on a selfie stick and hold it above your head. Using a self-timer will give you time to move your hands away from the camera and hide underneath it as best you can. Don't worry, it's easy to remove, blur, or cover yourself later. Always do your best to keep your camera vertical to avoid unlevel horizons in your shots. Another problem I had with the previous shots of the bridge is that the stunning view of Sydney Harbor was blocked by this ugly metal fence, so this time I held my selfie stick high above my head, giving my 360 camera a clear view of the best city in the world, then I repeated the shot five times, one on either side of the bridge, one in the middle and two in between those. Now, if you're covering a lot of ground and getting hundreds of shots and I'm talking over a kilometer, or a mile, then shooting on a monopod, or stopping every few meters to take a shot is going to take forever, so there are two ways to speed up shooting when you want to cover a lot of ground like this. The first one is switching into interval mode, AKA photo time lapse mode and setting the interval between two and 10 seconds, depending on how close you want the shots to be. If you use this technique, be sure to shoot with a fast shutter speed to avoid motion blur. The second way is shooting a 360 video, so this time, you're obviously shooting video instead of photo. Later on, either you or Google will pick individual frames from the video every three to five meters and link them together to create what is called a blue line, where the photos are linked together and to the rest of the map. This technique only works for videos shot outside and with the GPS switched on. Now, all three shooting methods can be done directly in the Street View app by connecting your camera to your phone via wifi, however, this method doesn't allow you any manual control of the exposure, nor any editing ability, so only shoot this way if your objective is quantity over quality. Also, there are only certain cameras that are compatible with the Street View app. I'll link the compatibility page below, but don't worry, photos from any 360 camera can still be uploaded manually through the app, after you've taken them. Now, how much effort you put into shooting and editing your shots is completely up to you. For my Harvard bridge shots, I shot in single shot RAW, color corrected in Lightroom, stitched and leveled the shots in Ricoh Stitcher, removed the noise in Topaz Denoise, removed the tripod, AKA myself, in Photoshop and upscaled the quality and resolution in Topaz Gigapixel. I know that's a long workflow and it really is not a necessary workflow just for Street View, so it's also okay if you just want to shoot and upload without doing any editing. If you do prefer a shorter workflow like this, then I would suggest at least using inbuilt HDR mode to improve the overall dynamic range of your shots. There are enough photos on street already with contrast and exposure issues. Oops. But hey, sometimes any photo is better than no photo, right? Another big factor for editing versus not editing is if you're shooting professionally for clients, or just for fun. For clients, I'd always advise getting your production value as high as possible and taking the time to edit your shots properly. Now, there are currently four ways of uploading your shots to Google Street View. While there's no official desktop software, you can upload directly from Google Maps in your desktop browser. This is quick and easy, but only allows you to add photos to existing business listing and points of interest, instead of manually placing them where they belong on the map. A much better way to upload is using the free Street View app for iOS and Android, which I'll link below. Some 360 cameras will connect directly to the Street View app and some won't. Regardless, all 360 photos can be uploaded manually, through the app, from your phone's camera roll. Some 360 camera apps also have a Street View upload feature inbuilt into them, however, it's not super common. The final way of uploading to Street View is through a third party virtual tour software, like GoThru, Panoskin and others. Say if you wanted to put an interior virtual tour of a business you've already created onto Street View and connect it with the rest of the map. Of these four methods, I'd recommend using the Street View app for individual photo uploads and a virtual tour software for uploading and connecting a larger number of photos with more precision, but before we start the upload process, there are two rules to keep in mind. The first is that since Google is such a popular website and your photos are inevitably going to get a lot of views, you can't be posting photos of people's faces or car license plates without their permission. If those two things incidentally show up in your shots, then you should blur them out before you publish to Google. This can be done both in the Street View app and using virtual tour software. The second thing is that while you don't have to, you are allowed to patch the Nader, which means adding a circular graphic at the bottom. Google allows one patch, top or bottom, covering 25% or less of the shot. The only rule is the graphic must be relevant to the shot, so while you couldn't put a McDonald's logo in some of my Harbor bridge shots, you could, if the shots were actually taken inside an actual McDonald's restaurant. This graphic can also include just the photographer's details, including business name, website and phone number. That's you. This graphic has the potential to be seen by hundreds of thousands of people and could prove to be a useful marketing tool, so feel free to add one if you wish. Okay, so I've airdropped my five 360 photos to my phone and opened up the Google Street View app. The first thing we're going to do is hit the camera icon down the bottom right and import 360 photos. Now find the shots on your camera roll and hit import up the top right. All right, the photos are ready and the first thing we're going to do is assign a location to them, so I'm going to select all five. Now in this menu, I'm going to go pick a maps listing. Now, choose your location here at the top. It's found mine and that's the Sydney Harbor bridge. Now we have the option to do really basic edits to these photos, so if you want to, say, blur faces, just tap on the icon and now we can zoom in. Let's say we don't want this face to be visible, all you do to blur a face is tap and hold, hit the tick to add a blur. There is also an option for Google to do this automatically. By opening the menu in the top right, you can choose detect faces and add blurs. Now next, what I'm going to do is tell it specifically where each of these five points is along the Sydney Harbor bridge, so I'm going to choose the first shot here and using the menu in the top right, I'm going to choose edit location. Now what we have is the map up the top and we have our photo down the bottom and what we need to do is align up the two, so they're in exactly the same point and I can see already that it's done a good job at finding specifically where I was. This is the far side of the Harbor bridge and the GPS data was pretty accurate here. As you can see, when I move the photo down the bottom, the radar right here changes and that corresponds with the direction the photo is oriented. So you can see here that this is looking across the bridge and the radar is accurately showing that it's lined up in the right direction. If, for any reason, this is wrong, you can adjust the compass down here and move the radar in a different direction and yeah, I think that is about right. So now, one by one, I'm going to go through these photos and adjust the compass so the red radar is facing the right direction. I think we're ready, so I'm going to hit publish all and my Google account is already connected to the Google Street View app, so it already knows that it's uploading these to my specific account. Now I'm hitting publish and there it goes, we are uploading five awesome shots to Google maps and that's it. Within the next day or so, these five photos will be live on Google. We can always come back and edit these in the future, by the way. If you realize you made a mistake with the location or the GPS coordinates, it's pretty easy to come back and fix it in the app. Now using the app is fine if you have a few individual photos, like the ones I uploaded here, however, if you're capturing a really big location and have a lot of shots that you also want to connect to each other, a better option would be using a dedicated virtual tour software that offers batch Street View upload. There are many options to do this, including Pano2VR, 3DVista, Cupix, Matterport and a few others, however, the front runners that offer Street View upload as their primary purpose are GoThru and Panoskin. Both platforms are affordable and have a ton of great features for creating virtual tours and getting them onto Street View quickly and easily. Both have free trials too, if you want to try before you buy. If you do decide to get a paid subscription to any of these platforms, then cancel in the future, your tours will still remain on Street View, since the photos are uploaded to your Google account, not just the software and will stay in your Google account until you decide to remove them. Now, most of these virtual tour platforms have their own dedicated YouTube channels with helpful tutorials guiding you through the entire process. To find them, just search YouTube for the software you've chosen and it shouldn't take too long to find them. If you're still undecided on which software to use, be sure to check out my which is the best virtual tour software video. The only thing I'd add to that video is that if you think you'll be uploading to Street View a lot, then I really would recommend GoThru or Panoskin, since they allow the most amount of customization of Street View tours and also have the best prices for uploading complete tours to Street View. I also have a good friend, Street View Eysteinn, who has a YouTube channel dedicated entirely to Google Street View, so I'd strongly suggest checking out his videos, which also cover GoThru and Panoskin and differences between them and if you want to learn more about virtual tours from me personally, I have a video course that is 12 hours of in depth training about the entire process. It's called Virtual Tour Pro and even if you're a beginner, with no experience, uploading your very first shot to Street View, it'll show you exactly what to do to become a virtual tour pro, who gets clients and gets paid for your 360 work. You can enroll at virtualtourpro.com, or follow the link in the description. Now I want to wrap up this video with a few Street View fun facts. Fun fact one, what happens if two photos are in the exact same location on Google maps? And this actually did happen with the photos I took on the bridge, since it's obviously such a highly searched and photographed area. What happens is they'll both be published, even if there's only a tiny bit of distance between them. Street View's behavior is known to be a bit unpredictable, however, rumor has it that in some situations, Google eventually determines which one is the superior photo, based on factors like image quality, how recent it is and so on. Fun fact two, can you replace or remove someone else's photo? The answer is not really. While you can add a photo in the exact same spot, like I mentioned, there's no guarantee it'll replace it. You can, however, report a shot for being poor quality, breaching privacy, or being inaccurate. However, that's still no guarantee that Google will actually take action and remove it, so you may have to reach out to the photographer yourself and ask them to remove it from their Google account and good luck with that. Fun fact three, can you still become Street View Trusted? Good question. For many years, Google offered an official title and badge of being a Street View Trusted photographer to anyone who successfully published 50 photos to Google maps. While the title didn't really mean anything, it did give photographers a slight boost in credibility from using the Street View Trusted graphic in their marketing. Now, at the time of making this video, the Street View Trusted program has been on hold for a number of months now and very little information has been and divulged as to why. Unfortunately, Google aren't very communicative with their user base when it comes to Street View and when the program comes back is anybody's guess. Rumor has it though, that it will be back soon, or back in another form, however, to be honest, I think it's a better idea to use more effective marketing and client acquisition techniques and not be overly reliant on the Google badge. Future clients will never see your badge to begin with, if you can't grab their attention somehow and your marketing techniques will have much more influence over winning you over a new client, than being a Street View Trusted photographer. If you need ideas about how to pitch and win new clients, again, this is something I cover in depth in the Virtual Tour Pro course. To summarize, Google Street View is definitely a platform worth using, especially if you're working with it professionally, due to the high visibility of Google being a great value add for clients. If you're using it for fun, like I did here with my Harvard bridge shots, that's okay too. The world needs more quality 360 photos and Google offers the best visibility of any 360 photo platform right now. And that's it for this video. If you found it useful, then be sure to hit that subscribe button for more coming soon. I'll catch you next time. ---  Virtual Tour Pro Course by Ben Claremont | Save 15% with Coupon Code (WGANVTP) and also receive a bonus of 12 free months of WGAN-TV Training Academy Membership |
||
| Post 1 • IP flag post | ||
|
WGAN Forum Founder and Advisor Atlanta, Georgia |
DanSmigrod private msg quote post Address this user | |
   eBlast received Thursday, 20 August 2020 --- Virtual Tour Pro Course by Ben Claremont | Save 15% with Coupon Code (WGANVTP) and also receive a bonus of 12 free months of WGAN-TV Training Academy Membership |
||
| Post 2 • IP flag post | ||
|
roballoba private msg quote post Address this user | |
| Ben has been VERY informative! TRUE ROCK STAR in 360 world. | ||
| Post 3 • IP flag post | ||
Pages:
1This topic is archived. Start new topic?